Monday 13 October 2014

Soltan Ephemeris Tour

Earlier in the year, I posted previews of the Soltan Ephemeris, the solar system of the +World of Calidar.  Since then, on Facebook and Google+ I've posted various pieces of concept art — renders of each planet, set against beautiful NASA space imagery.  All of these come together in an illustration on page 119 of Calidar: In Stranger Skies, which shows the Soltan Ephemeris in all its glory.

You can see how to go about making things like this in the tutorials on my Cartography Links page, accessible from the menu bar at the top of this page.  (I watched them all and then took the bits I liked best.)

But today I thought it would be fun to gather them all up together here in one place.  At the same time, I've put together another video tour showcasing all of these images.

Calidar In Stranger Skies, Soltan, planet render, Thorfinn Tait Cartography
The Mighty Soltan
I had a lot of fun making this image.  I actually created a full equirectangular projection map of Soltan's "surface".  I'm not sure it will ever be needed aside from in making this image, but you never know with fantasy settings.

Soltan is utterly vast: 110 times the size of its largest orbiting planet, Calidar.  It's really very similar to our sun in most respects.

Narrated tour of the Soltan Ephemeris at YouTube

Wednesday 17 September 2014

Five Calidar PDF Secrets

Making the most of Calidar's PDF digital editions

Calidar's Kickstarter fulfilment is proceeding apace, and the PDF versions of the main book and the Kickstarter exclusive short story compilation have both been sent out.  Public release is drawing closer and closer, and hopefully Kickstarter backers' books are winging their way to you as I type.  Here's a little look at the PDFs to tide you over.


One of the last things I did for +Bruce Heard's first +World of Calidar project before release was preparing the PDFs.  Coming off of layout, it felt like the logical next thing to do — creating an index, bookmarking, creating hyperlinks, and a few other little tricks to enhance the usability of the PDFs.


But you can't use them unless you know they're there, so I'm going to take a moment to introduce these hidden features.  (Note that I will be explaining these using Adobe Reader.  Not all PDF readers give you access to all of these options.)

1. The background can be turned off

In the Layers tab, you can see the layers that make up the PDF file.  Not only that, you can even turn them on and off.

In the current version, all the text and images are on Layer 1, while the background elements are on the layer named Background.  This means you can turn off the parchment background graphic to print out on white paper.  (For your own use, of course.)


Notes: Layer 2 is empty, and currently the deck plan backgrounds are not on the background layer.  With Bruce's approval, these things can be fixed in a future update.

2. Bookmarks for easy navigation

Both of Calidar's PDF files are fully bookmarked.  Access the "Bookmarks" feature (called the Table of Contents in some PDF readers), and you will get an expanded version of the Table of Contents right in the sidebar.

Rather than just duplicate the Table of Contents, I went a step further and added in all the sub-sections, as well as two separate lists at the bottom: an index of maps and an index of art appearing in the book.  Using these lists you can peruse all of the maps and art, as well as getting a caption for each picture telling you what's in it.

Neat!


3. Table of Contents and Index are hyperlinked

In addition to the bookmarks, the book's actual Table of Contents itself is made up of hyperlinks to its various sections.  These links are invisible, but that's okay because everything is linked.


The page numbers listed in the Index are also linked.  When there is a range of pages, the links take you to the numbers shown, which is to say the first and last pages in the range.

I also indexed the art and maps.  This is what the "Hidden Text" layer is there for.  You can't see it, but it actually includes text captions for each image, allowing them all to be indexed just like regular text.  To differentiate these, we used blue for art, brown for map references.


4. References are hyperlinked, too

You know when the text says things like "see This Section" and "for which see That Section"?  These are all hyperlinks, too.  The linked part is the bold chapter or section title.


5. Maps include scalable vectors

While most of the visual elements of the maps are medium resolution raster images, some of them include vectors — and all of the text is plain old vector-based text.

What does this mean?  You can zoom in on vector text and images and it will remain sharp.  And the text is fully selectable and indeed searchable: a normal search on the PDF will throw up text on the maps.

Maps which include vector elements include the Soltan Ephemeris Orbital Diagram (fully vector), the World of Calidar world maps (everything but the coastlines is made of vector art), and the City of Glorathon (only the external terrain is not vectors).

Best of all, all of the deck plans are 100% vector.  This means that you can zoom in as much as you want, and they will remain crystal clear.  You could use this feature to create floor plans for use with miniatures, for example.  (Again, for your own use, of course.)

Zoomed in view of the Star Phoenix's Forecastle, generated from the PDF.

Calidar is here...  Time to explore!

All of these points apply to both the main book CAL1 In Stranger Skies, as well as the Kickstarter exclusive PDF, CST1 Under the Great Vault.

Happy reading!

Tuesday 16 September 2014

Guided Tour of Meryath

Welcome to the Kingdom of Meryath!  As promised, I have created another video tour to preview and explore +World of Calidar's second poster map, the Kingdom of Meryath hex map.

This map was the result of a stretch goal in the Kickstarter campaign, in which it was available as an add-on.  Very soon now it will also go on sale on eBay.

It was a pleasure working on this map with +Bruce Heard, who has always been a master at this style.  We developed a new set of hex art, including settlement symbols by Bruce as well as terrain by myself.

The video also explores the topographical style of map, which we used for Meryath's map in the book itself.

Enjoy!


Saturday 13 September 2014

Calidar Kickstarter Fulfilment

If you have been following +Bruce's blog (notably here) or his posts on Facebook (embedded below), you will already have heard that the fulfilment process has begun.  To sum up (and spread the word):

  • The poster maps are away!  International backers' packages were sent on Wednesday 10th, US backers on Thursday 11th.  Has anyone got theirs yet?
  • Admirals' packages were sent on Tuesday 9th, except for four packages still awaiting the softcover book.  (More on this below.)  These packages include the hardback book (signed and dedicated), poster maps, cloth map, and bookmark.  I'd love to see some "unboxing" pictures from you guys!
  • Hardback books for international backers were ordered from DTRPG on Friday 12th.  These will be printed and shipped directly to backers.  Books going to Brazil will first be shipped to Bruce, then on to Brazil.  And there is a problem with Canadian orders which will hopefully be sorted out very soon.
  • Hardback books for US backers are scheduled to be ordered today, Saturday 13th.  These will also be printed and shipped directly from the printer to backers.
  • Softcover books have been stalled, but the problem has been found and dealt with.  I'm sure Bruce will be posting more about this soon.  Due to the way DTRPG works, it will likely be another two weeks or so before these can be ordered.
  • Main book PDFs are scheduled to be delivered in the form of coupons for download from DTRPG this weekend.
  • Kickstarter exclusive PDFs, titled Under the Great Vault, will likely be delivered at the same time.

And that's that.

Having worked on this project for so long, I'm really excited to see it get into your hands.  Kickstarter backers, I'd love to hear about it when you get your stuff!  According to Bruce's latest update, things have already started arriving.

Calidar In Stranger Skies, Under the Great Vault short stories cover
Cover for the Kickstarter exclusive PDF.
For those of you who missed out on the Kickstarter, it shouldn't be long now before the book and poster map go on general release.  Bruce has added a new permanent page to his blog, with a short overview of Calidar's product library, and information about where things will be available.

At the same page, you can read an overview of Under the Great Vault, the Kickstarter-exclusive PDF compilation of Calidar short stories.  Good news for people who missed the Kickstarter, too: this PDF will be made available again in future Kickstarter campaigns, of which Bruce mentions the next will be held sometime next year.

For Kickstarter backers, the inclusion of the Kragdûras (dwarvish) dictionary after the short stories is a little added value.  Think of it as a thank you for all your support, as well as your patience in dealing with production delays.  I spent a couple of weeks reformatting Bruce's original blog entry in order to present it in book form, and I think it has turned out great.  I hope you'll find it as useful and fun as I do.


Saturday 30 August 2014

Blog Troubles

Visualising Calidar through word clouds...  My post didn't publish right, so let's try this again.


Calidar in Word Clouds

I've been very quiet for the past ten days or so.  This is usually a sure sign that I'm busy working on something, and in this case that something has been indexing.  Specifically, I have spent many hours in InDesign creating an index for the PDF version of the soon-to-be-released first +World of Calidar book, In Stranger Skies.

If you're anything like me, you probably think an index is something generated automatically by software — throw some keywords and it and let it do its magic.  Unfortunately, this couldn't be further from the truth.  The software does help, but it's 90% human input.

And it takes hours.

Still, hopefully it will all be worthwhile when the book comes out, and readers get to skip around the PDF version using the index and bookmarks I've put in place.

All of this sifting through the text has given me a somewhat unique perspective on strange and useless trivia such as which character name appears the most (Captain Isledemer d'Alberran, naturally!), how many pages the word Calidar appears on (22 out of 132), and which skyship has the second most mentions in the book (Meryath's flagship, the Eternal Glory).

This led me to think about how I could visualise all of this, so I came up with these word clouds.

The first shows the most common words used in Calidar: In Stranger Skies, including both the story and gazetteer sections.

Bruce Heard's Calidar: In Stranger Skies word cloud
It's quite clear who the hero of this story is!

Next up is the story on its own:
Bruce Heard's Calidar: In Stranger Skies story word cloud
Not a lot of change, really — unsurprising considering that the story takes up about fifty pages by itself, and fiction contains a lot more repetition of words than gazetteer write-ups.

So next let's look at the gazetteer sections without the story:
Bruce Heard's Calidar: In Stranger Skies gazetteer word cloud
This is a veritable mine of key words and themes for Calidar.  Captain Isledemer d'Alberran is still in there, but he has yielded centre stage to the setting itself.  That's very much how the book reads, too.  If you've ever read the Voyage of the Princess Ark, you probably know what I mean.

And finally, here is one for the Kickstarter-exclusive PDF of short stories, which I am currently in the midst of assembling:
Bruce Heard's Calidar: In Stranger Skies Under the Great Vault word cloud
Look closely and you may spot a few words of Kragdûras dwarvish here and there.

Back to work!

Monday 11 August 2014

In Stranger Skies: An Insider's Review

 The skyship Star Phoenix flies low over Glorathon in the Kingdom of Meryath, Calidar: In Stranger Skies
First draft cover design, with art by Ben Wootten
A few hours ago, I completed and submitted the last tiny diagram for +Bruce Heard's Calidar: In Stranger Skies.  In Stranger Skies is the name of the first book for the +World of Calidar — hopefully the first of many more to come.  The layout phase is drawing to a close, and any day now Bruce will submit the book to the printers.

Now that my work on this book is done, I'd like to share my impressions of the project — an insider's review, so to speak.

I've seen a draft, and I have to say, it looks wonderful.  More importantly I have read through everything three times while proofreading, and the truth is that this is why I am so excited about the project: the writing.

Yes, I have been a fan of Bruce's writing and maps for more than twenty five years, and a member of the Mystara online community for seventeen of those, so sure, I'm biased.  But I'm also a picky and discerning reader.  I know what I like and what I don't like, and by extrapolation what is good and what is not.  (As always when it comes to opinions, your mileage may vary.)

Calidar is good.

I always enjoyed the Voyages of the Princess Ark series.  Every month I looked forward to its release, and indeed I bought Dragon solely for that one article.  The months when it didn't feature, I was not happy.  To be fair, I was also looking for articles for BECMI, but the Princess Ark was always my favourite.  Bruce's quirky humour and very current genre references made me smile every time, but the stories also served a purpose in introducing new areas.  The fiction brought everything to life, allowing readers to sample the flavour of a culture, which made the gazetteer sections all the more interesting.

I guess you could say I'm a fan of this rather unique pairing of fiction and gazetteer.

Well, the thing is, Bruce's writing style has matured and improved over the last twenty years.  In Stranger Skies is very much the spiritual successor of the Princess Ark, and there are many similarities.  Some will undoubtedly call it a reboot, although I wouldn't go that far myself.  You see, it's much more than just a reboot: it's a whole new thing of its own.

With Calidar, Bruce has created a whole new universe with its own themes and tropes.  It has some very interesting themes and plot devices built into the story and the setting, such as the Vortex, which allows a limited form of travel between realities; world souls as a source of magic and life; skyships and space travel, including multiple ways to travel the Great Vault; as well as some rather interesting dynamics which shape the relationship between mortals and their gods.

Calidar: In Stranger Skies, Great Caldera, Araldûr, dwarf, Kragdûras, fantasy map
An excerpt from the Great Caldera poster map.  Bruce came
up with a new language, Kragdûras, for the names.
You can see some of this in the short stories which Bruce has already released — and if you haven't already read them, you should — but it'll become apparent just how much there is when you read the main story and its gazetteer.

I would be remiss if I didn't mention another of Bruce's talents: he is great at coming up with names.  Any Mystara fan can attest the linguistic richness and logic of place names in Mystara.  It's no secret how he does this, by adapting real world place names, but it's also something that's very hard to get just right.  For me, as a Tolkien fan as well as a Mystara fan, I have been completely spoiled with great place names, and it's something that continually holds me back from enjoying many other fantasy worlds.  I'm sure I'm pickier than most in this regard, but suffice it to say that Calidar's names just fit.

So yes, the story is wonderful, and the gazetteer section is great.  In fact my only complaint about them both is that they're too short, and left me wanting much, much more!

John Dollar art Calidar: In Stranger Skies Gumboyle Moffeecot Mama Goo
Art by John Dollar showing the ship's cook — sure to be a fan favourite.
Moving on to other parts of the book: the art is sumptuous.  A total of four artists contributed to the book: Ben Wootten painted the cover art; John Dollar and Savage Mojo did interior art; and Pierre Carles drew the astrolabe which has become the Calidar Publishing logo.  All of these artists have contributed wonderfully to the look and feel of In Stranger Skies and indeed the whole World of Calidar.

Calidar: In Stranger Skies, Great Caldera, Kingdom of Meryath, Glorathon, Royal Domain, topographical map, fantasy map
My new topographical style in its most zoomed in form.
Obviously when it comes to the maps I am totally biased, but I hope you will enjoy them, too.  As my blog's subtitle suggests, I have made every effort to make Calidar's maps as accurate and consistent as possible.  Every town and city has its own latitude and longitude coordinates, and there is even a special coordinate system for each planet in the Soltan Ephemeris.  I have tentatively called Calidar's "Calidar 2014", although perhaps "Calidar 1512" would have been more appropriate.  You can see these things in the maps with graticules (latitude/longitude grid lines).

I have also developed my own original style for Calidar's topographical maps, which you can see on the Great Caldera poster map, as well as the in-book Kingdom of Meryath map, and the local map of Glorathon's Royal Domain.

Calidar: In Stranger Skies, Great Caldera, Kingdom of Meryath, hex map, fantasy map
Close-up of the Meryath poster map, with all new hex art.
For fans of hex maps, the bonus poster map shows the Kingdom of Meryath in glorious hex format.  It's 100% compatible with all the other maps.

I chose an appropriate projection for each of the maps: Stereographic for the Great Caldera, to show its shapes undistorted; Equirectangular for the world maps, to provide a familiar view; Albers Equal Area for the Meryath maps, including the hex map, to facilitate demographic calculations; and so on.

Of course, none of this matters if you just want to enjoy the maps for what they are.

Looking at everything together, I truly believe that Calidar: In Stranger Skies is a great product.  I am seriously looking forward to talking Calidar with all of you in the coming weeks and months.

You can bet I'll keep you updated on the release schedule.

Thanks for reading!

Thursday 7 August 2014

Guided Tour of Calidar's Great Caldera

A good friend suggested I do a Lord of the Rings movies-style map flyover video to showcase the maps from In Stranger Skies.  It seemed like a good idea, so I put together this slideshow.


Shortly after posting it, my friend persuaded me to add a voiceover, so it is now narrated.  That's right — you get to hear my strange accent.  Note that the pronunciations of place names are not necessarily accurate to +Bruce's vision, but that in itself seems very much in the tradition of Mystara and other old settings.

If this proves popular, I will definitely consider making preview movies for some of the other maps, too.

Thanks for watching!

Monday 28 July 2014

In Stranger Skies Mapping by the Numbers

I'm now approaching the end of my work for the first book of +Bruce Heard's +World of Calidar.  As I have said elsewhere, working with Bruce has been an absolute honour, and one year on from joining the project, I remain very excited about Calidar, cartography, and where this runaway train ride may eventually take me.

What I have accomplished over the past year goes far beyond the first Calidar book, and you will only see part of this when In Stranger Skies is released in the coming weeks.  A lot of my work has been laying the foundations for future maps, both in terms of creating the actual cartographic assets as well as expanding my own skills, knowledge, and toolset to be able to produce the best maps I can.

Here's a little teaser of the various maps:

Calidar In Stranger Skies map mosaic

I thought it might be fun to share with you just what this has entailed with some statistics.

  • 2 poster maps, one continental topographic, the other national hex
  • 16 maps and diagrams in the book, including:
    • 2 world maps
    • 2 polar maps
    • 1 continental map (variant of the poster map)
    • 1 national map
    • 1 local map
    • 1 town map
    • 2 system maps
    • 6 skyship deck plans
  • 700+ geographic labels on all the maps
  • 3 cover designs
  • 9 planet renders
  • 106 bookmarks for cartography articles and tutorials I've read, plus likely more I forgot to bookmark
  • 13 different iterations of the height map in various stages of completion across the Great Caldera and indeed the world
  • 17+ different programs: Adobe Photoshop, Adobe Illustrator, Adobe InDesign, Wilbur, Fractal Terrains, Astrosynthesis, Fractal Explorer, G.Projector, MAPublisher, Geographic Imager, Google Earth, Word, Leveller, Manifold, Paint.NET, Hexographer, Blender.
  • 868 GB of data (mostly in progress and rejected height map designs)
  • 10,750 (and counting) Facebook messages and 92 e-mails back and forth between Bruce and myself
And an awful lot of cups of tea.

Wednesday 4 June 2014

Great Caldera Poster Map Finished

Close to a year of work on the Great Caldera's overview map came to a head last weekend, and the map is finally complete, and entering the pre-print stage.

Vicinity of Seahollow, capital city of the fellfolk nation of Belledor, Great Caldera, World of Calidar.  Topographical map.  Stereographic Projection.
The area around Belledor's capital.
Exciting times for me, as this will be the first map I've ever had printed.  

Meanwhile, Bruce has posted two articles previewing the maps.  Part one covers the southern realms of the Great Caldera, while part two deals with the northern half.   He mostly concentrates on giving some background to the labels he devised for each nation.  It's a great read, with some tantalising hints of what is to come, as well as some classic Heardian humour.

I'd like to add a few comments about the creation of the art featured on these maps.

First up is the Belledor fragment at the top right, which depicts the area around Belledor's capital, Seahollow, in the province of Seafolk.

Grimsvik is the capital city of Nordheim, and also regional capital of Steinfold, Nordheim's leading realm, in the Great Caldera, World of Calidar.  Topographical map.  Stereographic Projection.
Grimsvik, capital of Nordheim.
The map is composed of numerous layers, which all come together to produce the terrain you see here.  At the base of everything is the height map, which I have posted about extensively already.  Suffice it to say that this map took about six months to design and erode at full resolution.  It is a 3D model, with sculpted mountains and valleys, rolling hills, and rivers meandering through the plains.  On top of this is a gradient map, colouring the terrain based on elevation, so that the plains and lowlands are light green, the hills are tan, and the mountains are grey-brown.  There are actually five or six of these gradient maps, allowing the painting of other terrain types such as grasslands, desert, swamp, and taiga on top of the plains.

What this means is that you can tell the elevation of any particular spot just by looking at the colours, and on the height model I can measure the exact height of any point on the map if necessary.  Mountains named on the larger scale maps (such as the hex map) refer to actual peaks visible on this map.

Central area of wizarding realm Caldwen, including its capital, Arcanial, in the Great Caldera, World of Calidar.  Topographical map.  Stereographic Projection.
Central Caldwen.
Next come the sea and lake masks, and the rivers.  The sea is a simple mask derived from the base height map, coloured blue.  The rivers are also generated from the height map.  We decided on the general locations during the design process, and then let erosion create the exact shapes in a natural way.  For some areas — Alfdaín comes to mind — this took multiple attempts, and was a bit of a headache, but I'm very pleased with the final results.  Lakes were added to the height map after erosion; Bruce designed logical shapes that fit in with the river systems, and I dug them into the height map.

At this point, we haven't done any work on lake or sea beds.  That may come at some point in the future, but for now it's all just flat surfaces.

With the land and sea all done, the last three layer groups add lighting, texture, and overlays.  Lighting consists of a 3D render of the height model, which with transparency effects gives shape to the underlying terrain.  Texture is predominantly visible in the sea areas, and to a lesser extent on the land.  It is a parchment texture, designed to bring consistency to the map.  I chose not to also incorporate the colour of the parchment this time.

Mythuín, in the Matriarchy of Andolien, is the capital of the elven realm of Alfdaín, Great Caldera, World of Calidar.  Topographical map.  Stereographic Projection.
Alfdaín's capital, Mythuín.
Finally overlays refers to the graticule (the grid of latitude and longitude lines over the map), borders, roads, icons, scale, legend, and of course all the labels.  This layer sits on top of everything else.

I will post more about all of these things after the release.

For now, I am now putting all my efforts into the second poster map, the hex map of Meryath, which is also mostly done.  The finishing touches should be done by the end of the week.  After that, it's back to the internal maps.  These, too, are at an advanced stage of design.  Everything should come together within the next few weeks.  It will not be long now before you can hold the book and the maps in your hands.

A full view of the dwarven realm of Araldûr, Great Caldera, World of Calidar.  Topographical map.  Stereographic Projection.
Araldûr, home of the dwarves on Calidar.  This image shows almost exactly what the final map will look like.

Saturday 19 April 2014

Calidar Pinterest Board

A while ago I created a Pinterest board to collect all of the Calidar maps and artwork that have been released so far.

Follow Thorfinn's board World of Calidar on Pinterest.

It's getting to be quite a nice collection. And of course there is a whole lot more to come — since the Kickstarter ended in January, I have been very busy working with Bruce on maps of all sorts: height maps, climate models, hex maps, deck plans, planetary maps, rendered planet models, system maps, and much, much more.  I'm sure we'll be previewing some of this stuff leading up to the June release.

In the meantime enjoy these previews.  Personally I can't wait to see more of John Dollar's artwork.

Sunday 23 February 2014

World-building: Building Base Height Fields


There are two stages to building a height map of your world: first you make the base height field, then you put it through the erosion process.  This article covers the first of these stages.  A separate article on erosion is also in the works.


Thorf's World-building Techniques: The Making of the World of Calidar
This is the fourth in a series of articles.
Click here for the series index.
Software
How you go about making your base height field depends largely on what software you have available.  I use Adobe Photoshop, but my techniques should also be possible in GIMP, which is a free alternative to Photoshop.

You can find lots of tutorials for Photoshop (as well as GIMP) over at the Cartographer's Guild.  I have consulted a large number of tutorials at the Guild in the course of this project, for which I am very thankful, and the Guild members are a very helpful and friendly group.  I highly recommend joining and posting there when you are in need of help or advice.

My method uses image editing software rather than height map editing software, but it's also possible to generate various kinds of random height maps using a fractal or height map editing program.  Fractal Terrains and Wilbur, both by Joe Slayton, are among the best of these.  Fractal Terrains is available from ProFantasy, while Wilbur is free.  We will return to both of these programs for other uses later in this series.  Other options include Leveller, World Machine, and Bryce.

The problem with all of these programs is a certain lack of control: the random element can get in the way, preventing you from generating terrain the way you want it to look.  Having said that, it's obviously a lot easier and faster to go with random terrain, so if it suits your purposes, go for it.

For this series of tutorials, we are starting this stage with pre-designed continental outlines, so Photoshop is our tool of choice.

What is a Height Field?
height field, height map, Torvan, Bruce Heard, World of Calidar, Thorfinn Tait
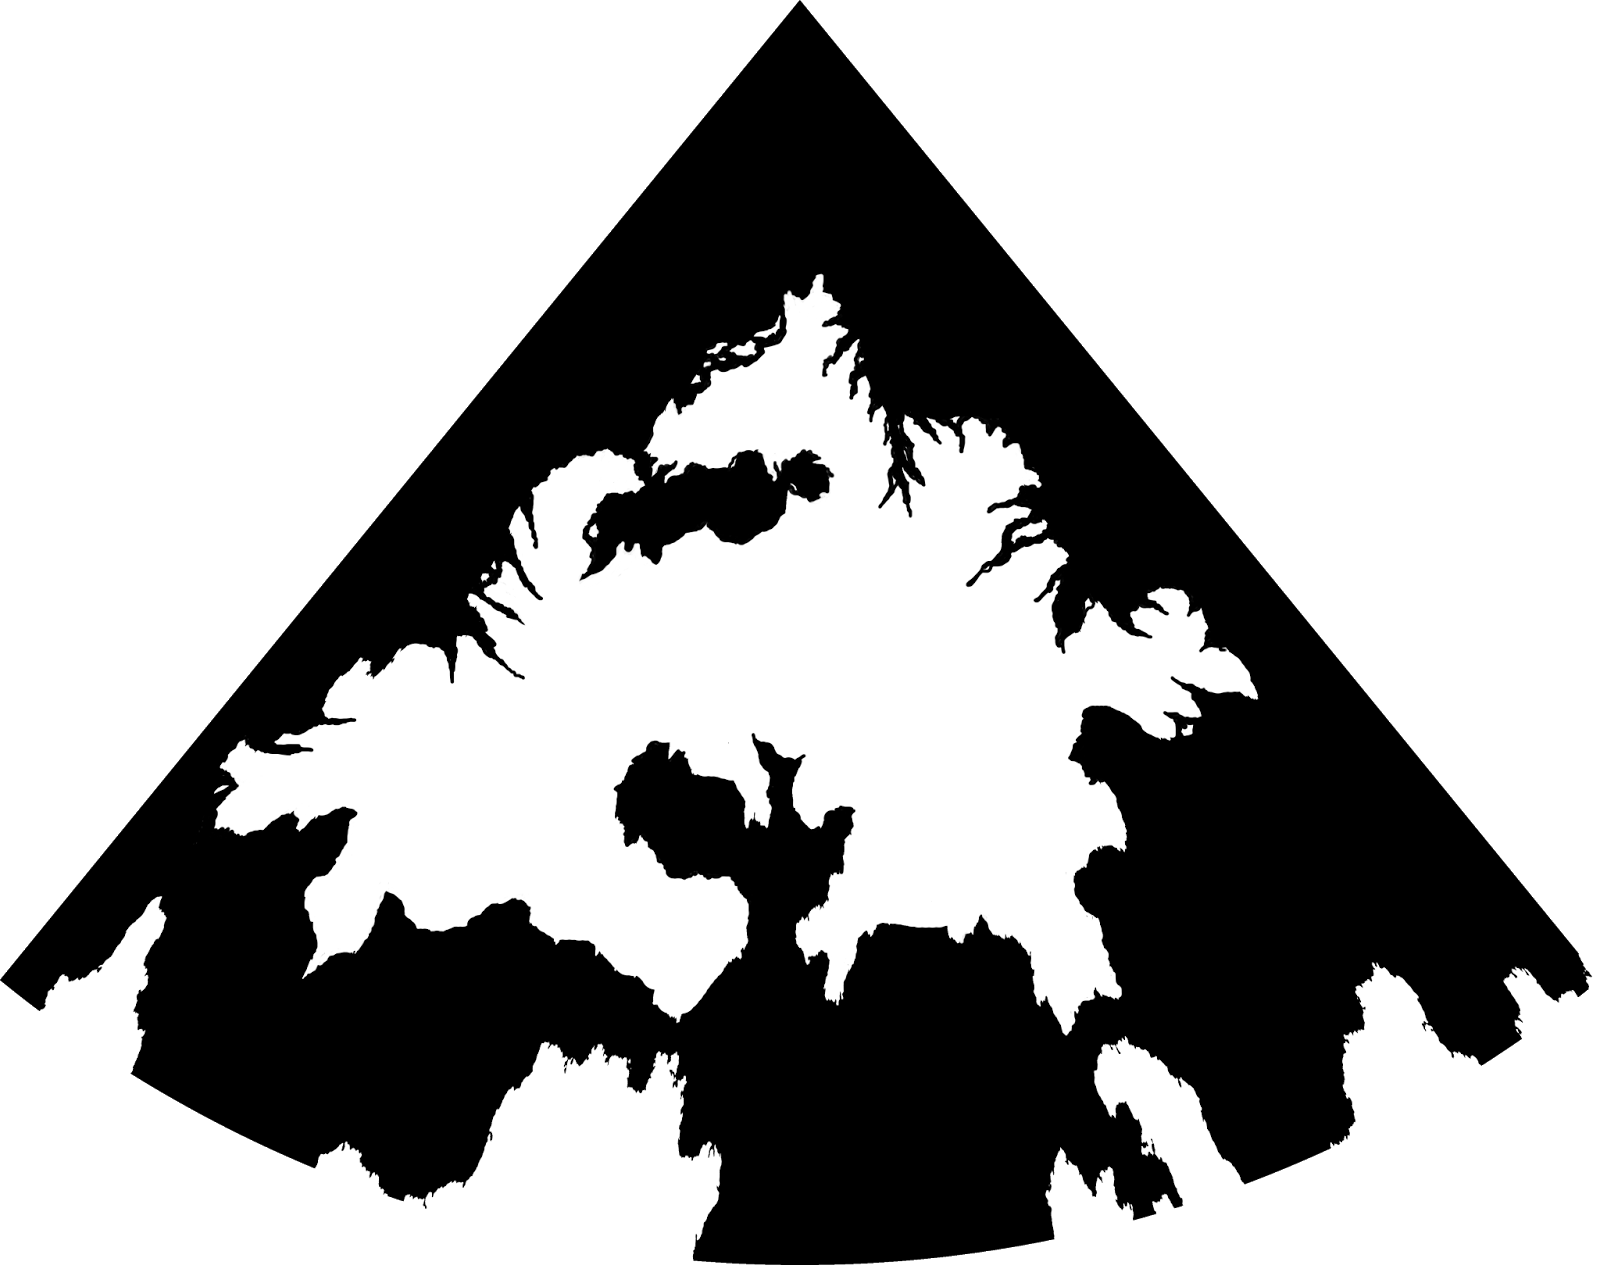
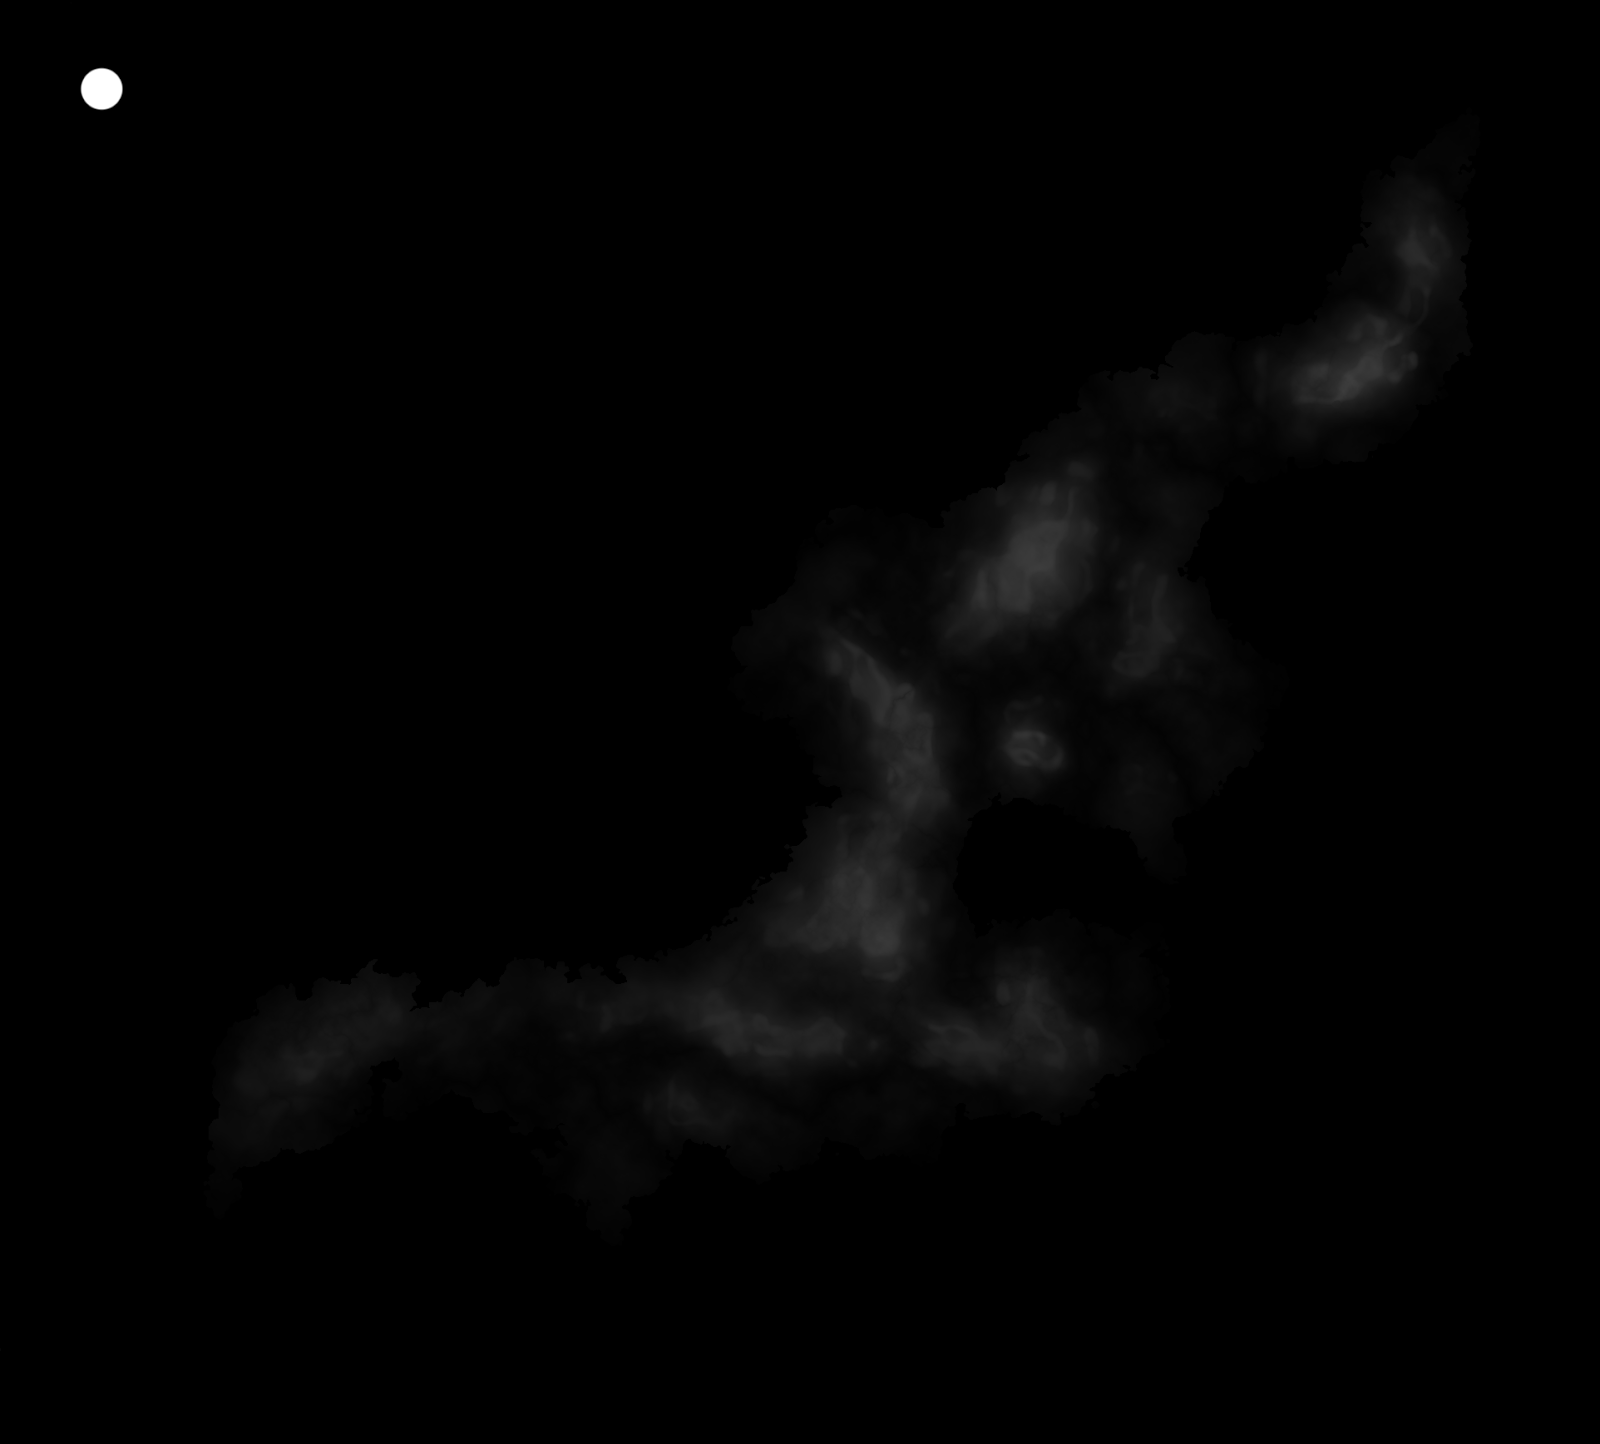
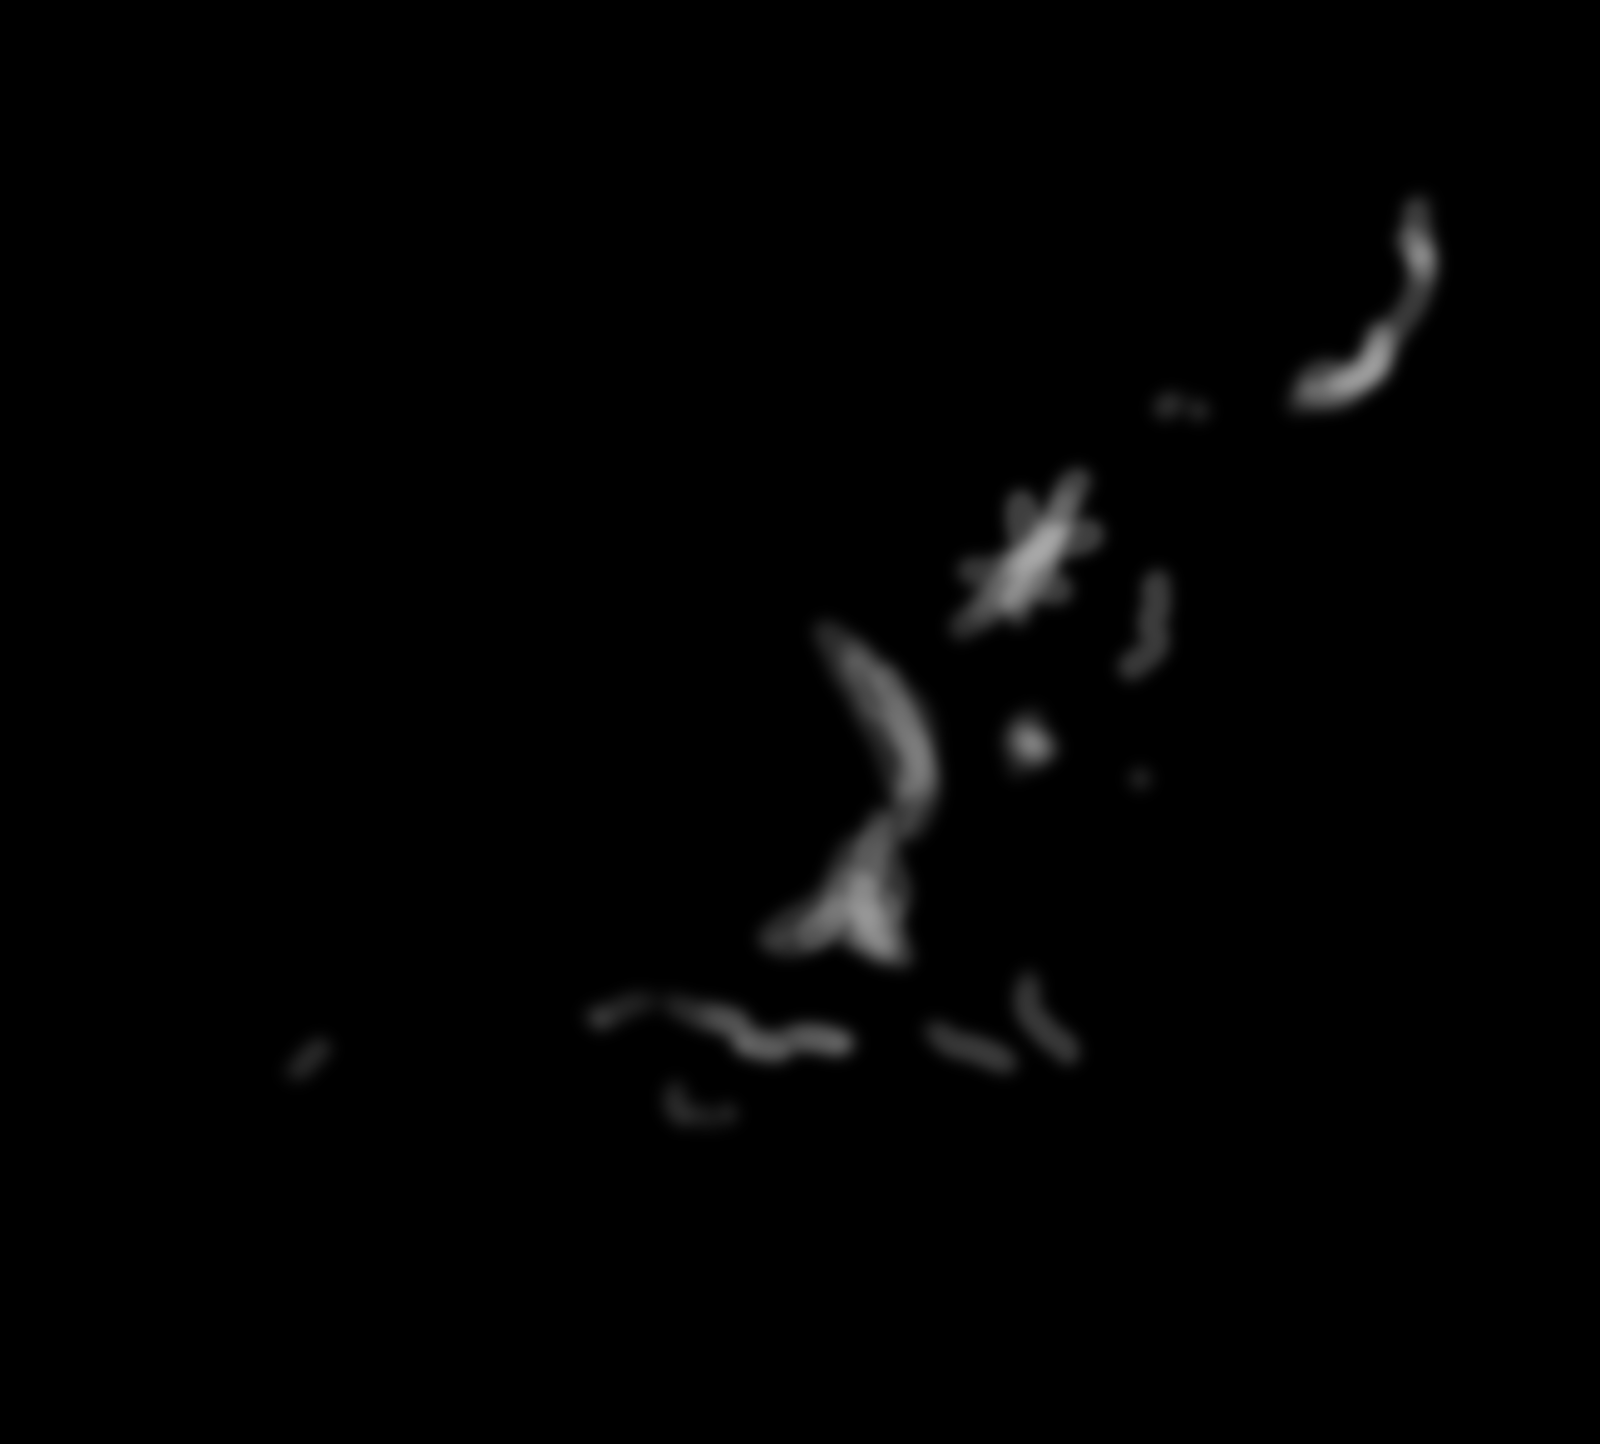
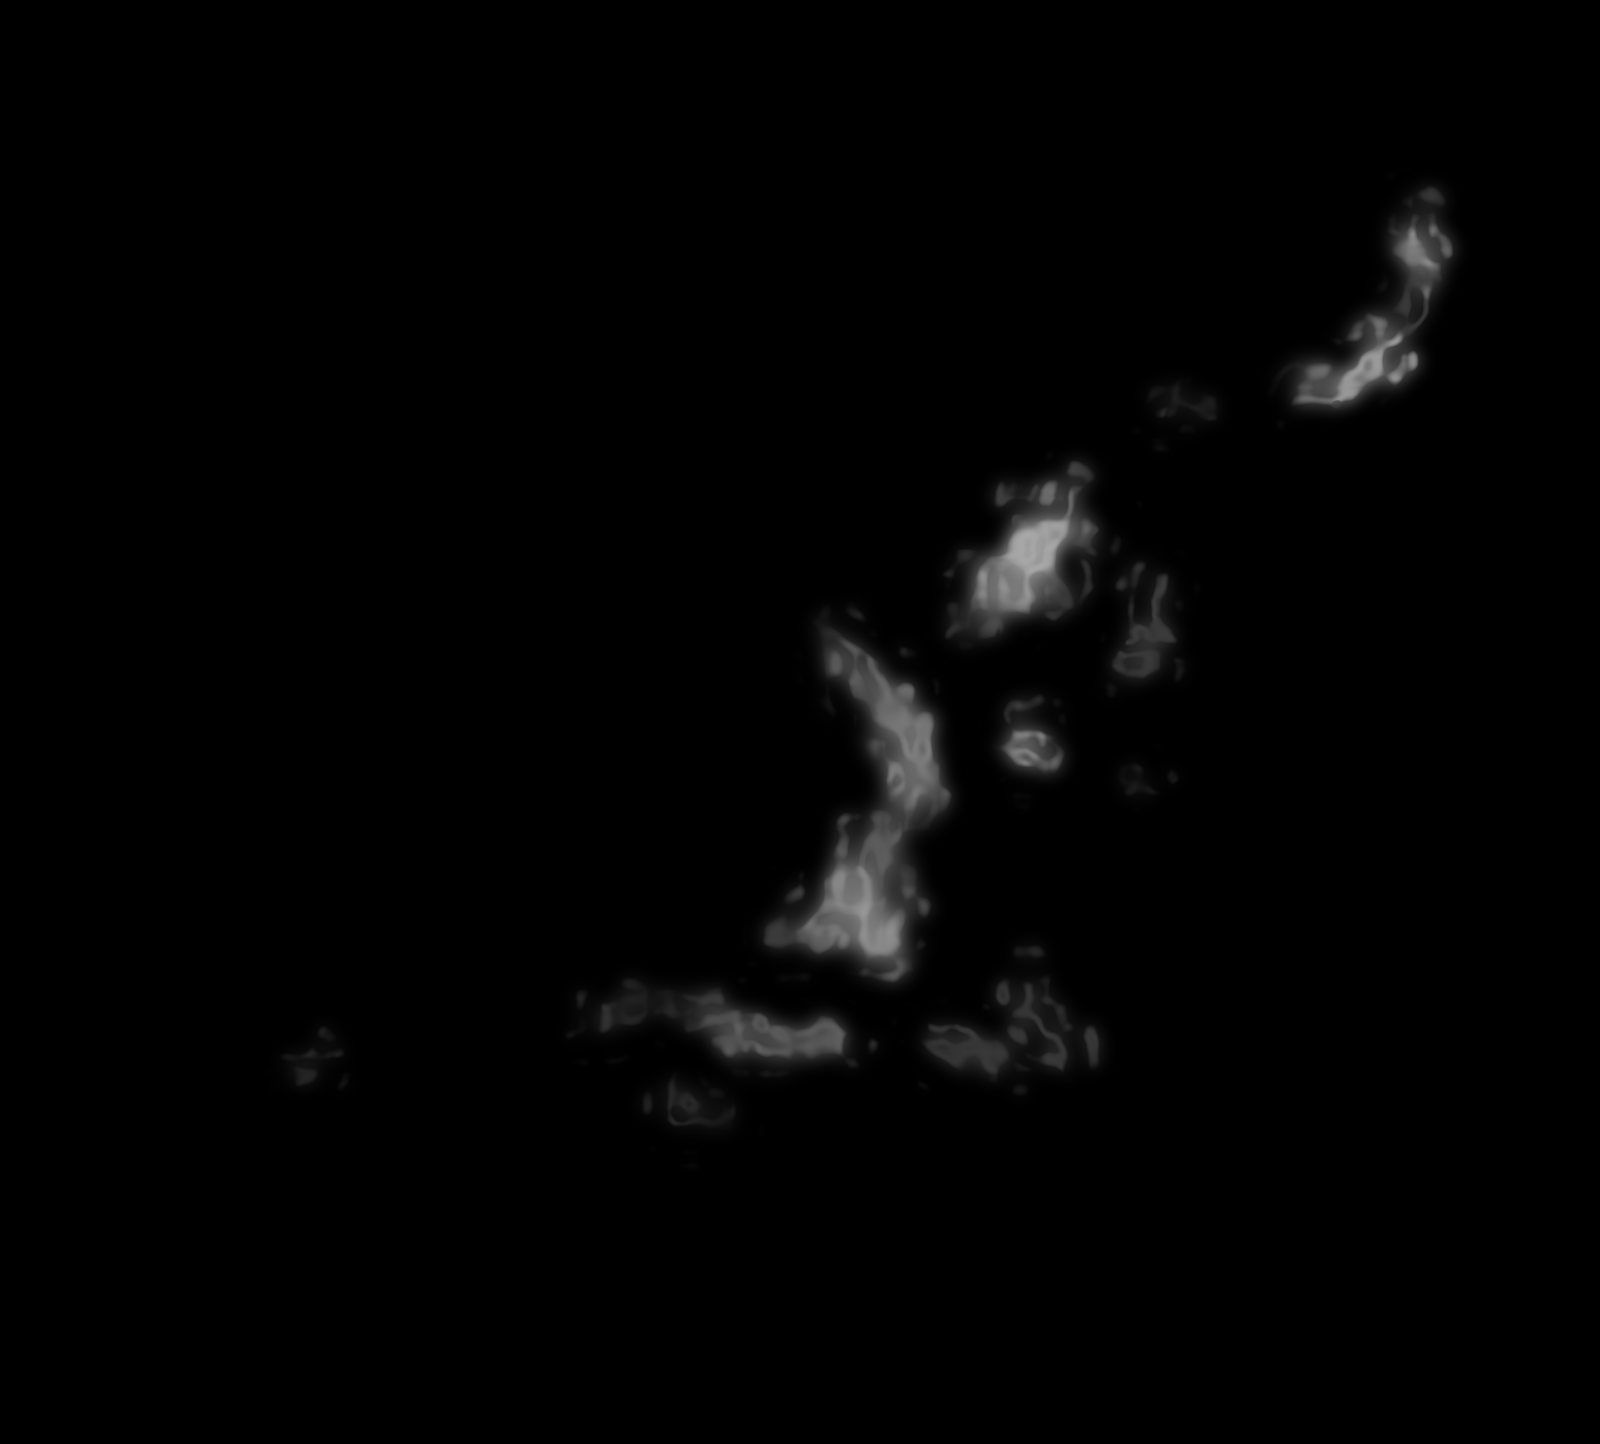
A greyscale PNG height field built using this tutorial,
showing the island of Torvan, southwest of the Great Caldera.
A height field is a specialised map of an area, modelling altitude/elevations.  They are also known as height maps, bump maps, or more formally Digital Elevation Models (DEMs).  Like regular image files, height fields are made up of point-based data, and in fact many height fields use the pixels of regular image formats such as PNG and TIFF to store and display their data, usually in greyscale.  Each pixel on the map represents the elevation at that point; as such, the resolution of the map directly determines the accuracy.

DEMs come in a variety of formats, but for our purposes the most useful are the most easily accessible and editable regular image formats.  I use PNGs for all my height fields.  (Note that Photoshop needs a third party plugin such as SuperPNG for full compatibility with PNG files over 30,000 pixels square.)

White is high, black is low
height field, height map, Torvan, Bruce Heard, World of Calidar, Thorfinn Tait
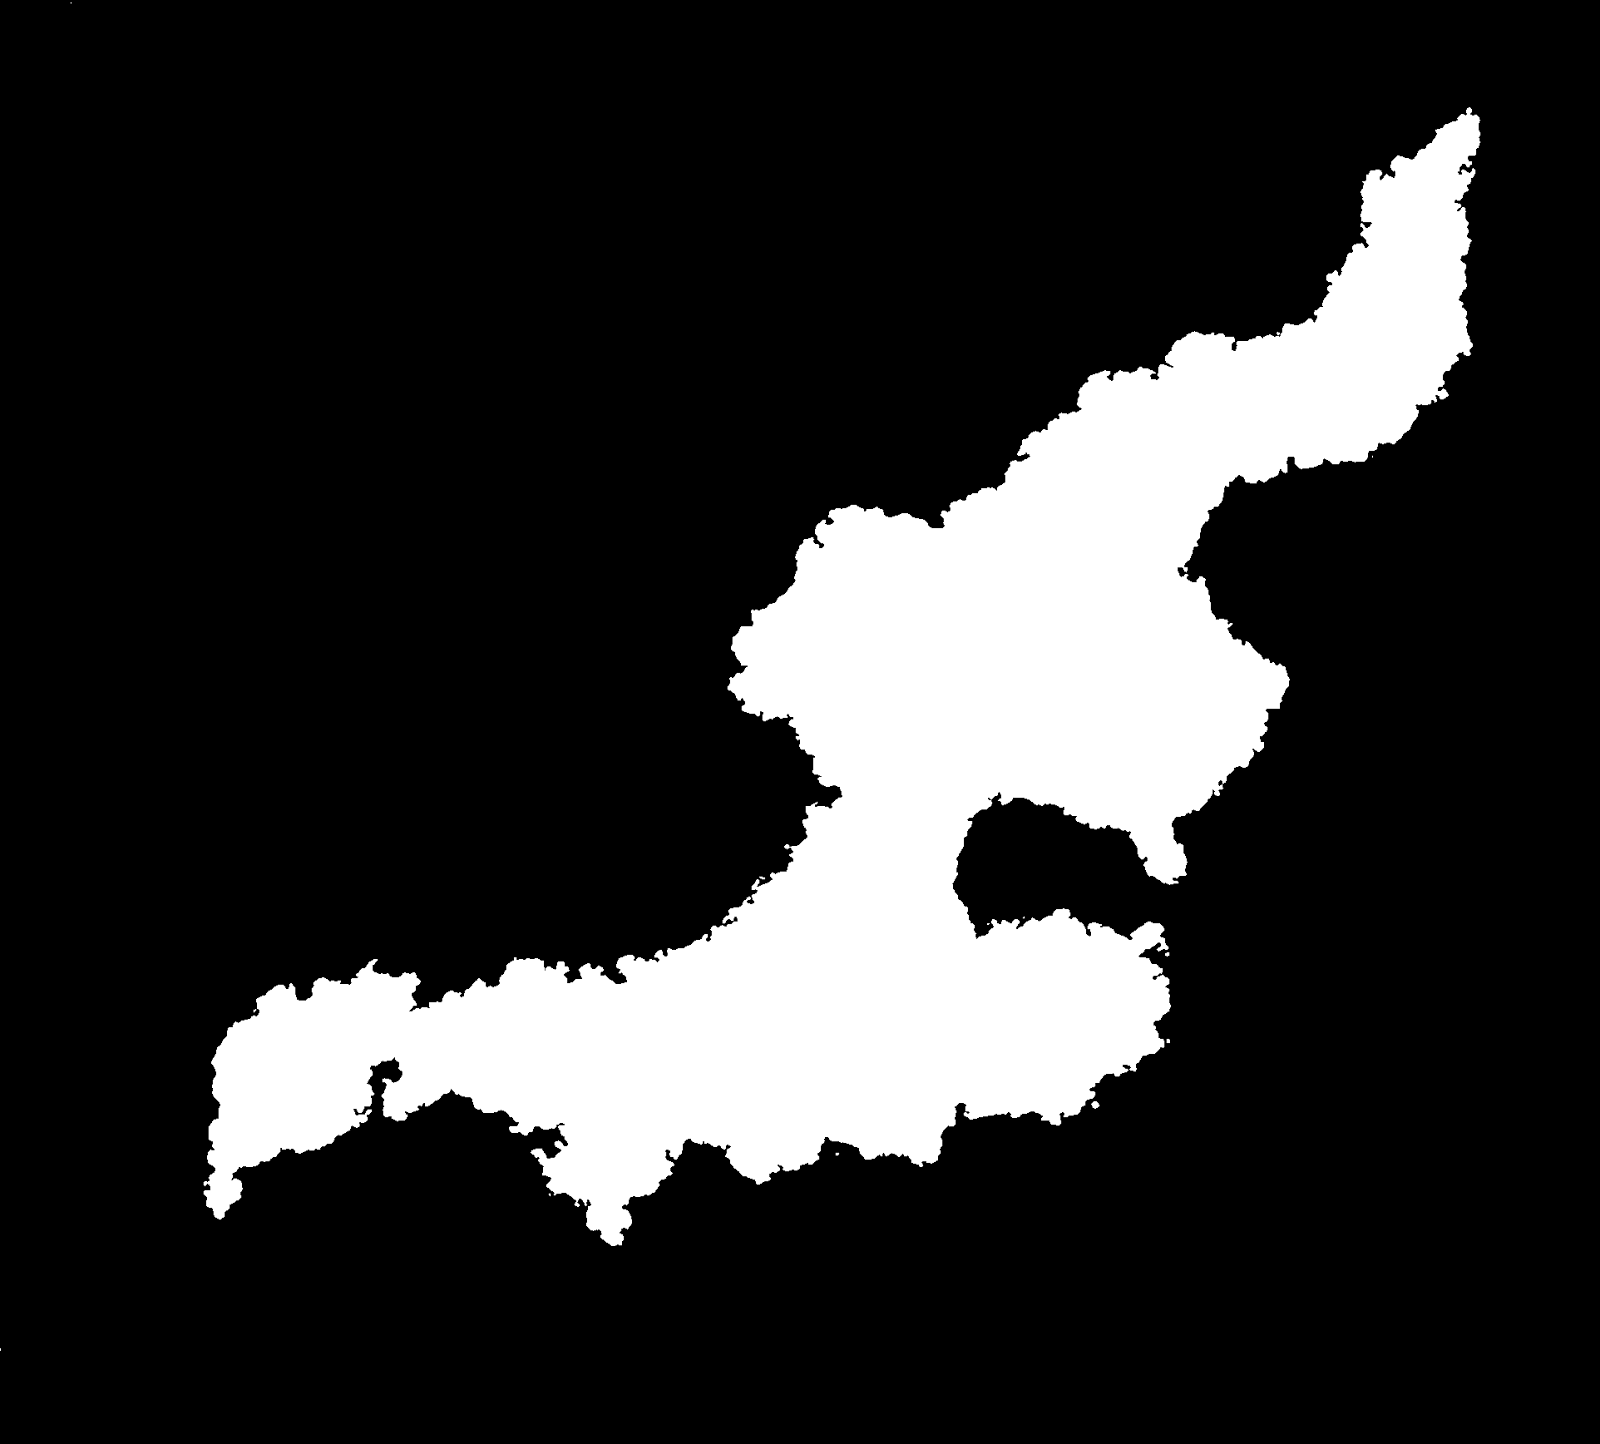
Do you see the black as the land?  Don't
worry, you'll quickly get used to seeing
white as the high ground, although it
may well seem counterintuitive at first.
In height fields, the highest points are represented in white, with darker and darker shades of grey standing for lower and lower elevations, until the lowest points are shown in black.  For this reason, height fields often show white land on black sea.  If the sea floor is not shown, pure black is sea level, and everything else is land.  It's also possible to show both the sea floor and the land, in which case a certain level of darker grey will represent the point where the sea meets the land at sea level.

Advantages of Height Maps
But what exactly is a height map for?  Why are they useful?  What do they allow us to do?

Well, since they show elevation data, they can be displayed as 3D models.  Because of this, they are often used for terrain in 3D computer games.  In terms of fantasy mapping, height fields potentially allow us to walk around and fly over the worlds we create.

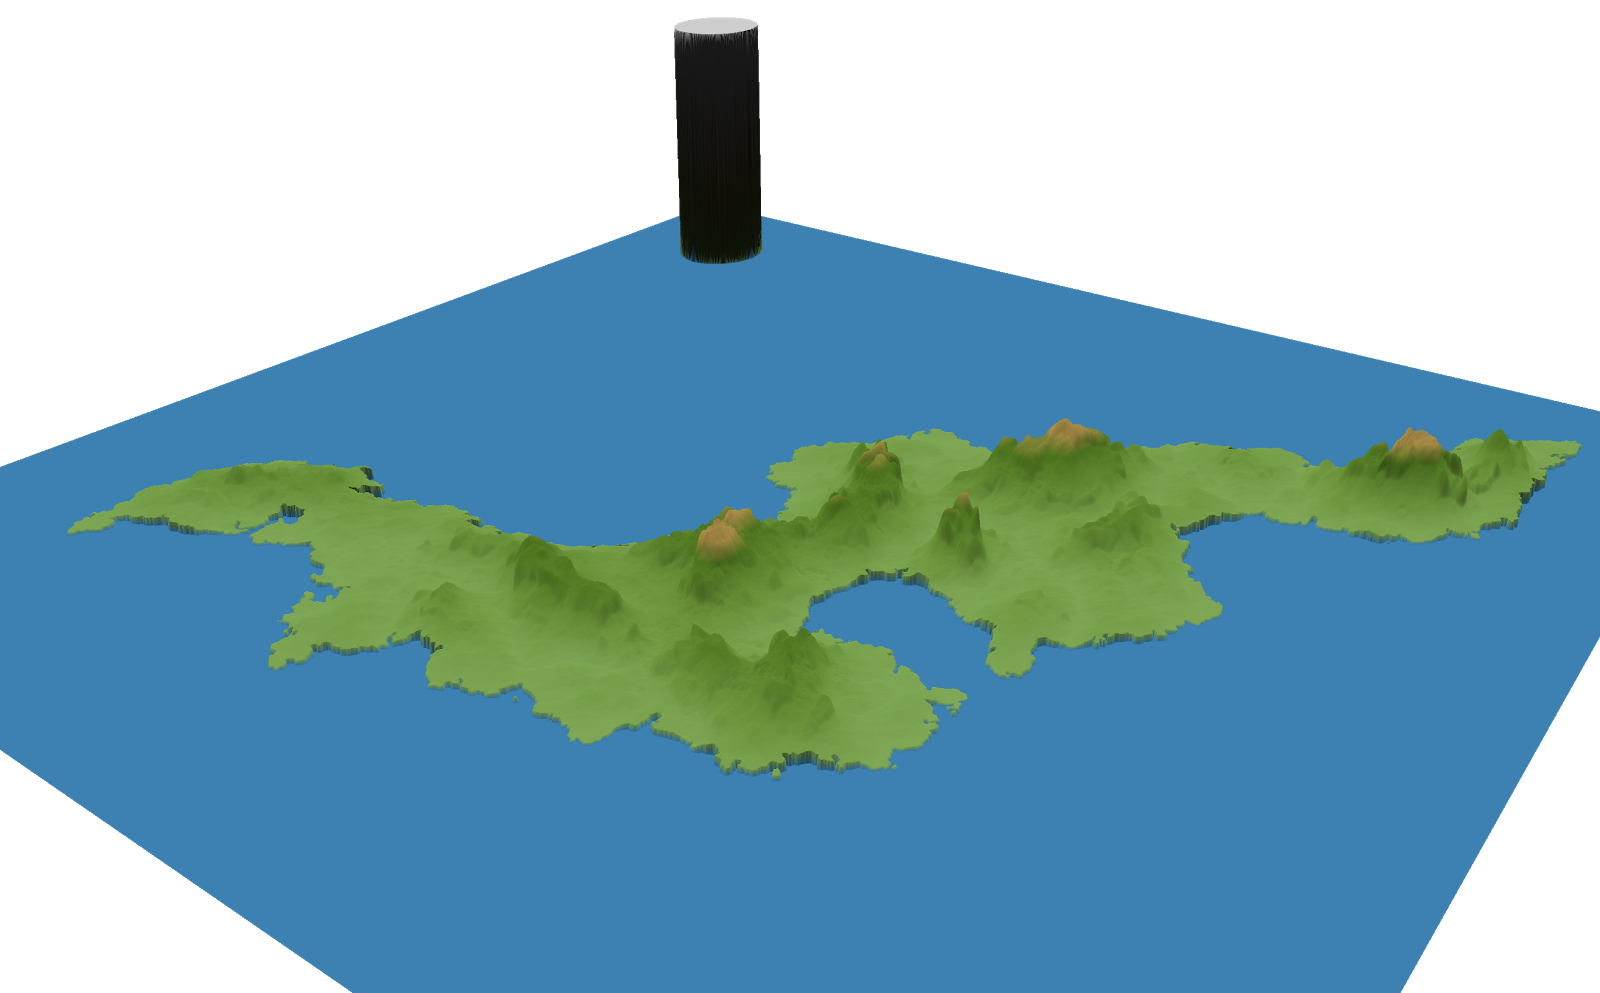
Wilbur's 3D preview of the height field above, using a custom shader.
The dark pillar is the height marker, showing the relative height of
Calidar's highest mountain, at 8,925 m.
But there's an even greater function for cartographers: they facilitate the creation of shaded relief — topographic shading showing the shape and contours of the land.  This can be done using various kinds of shaders in Wilbur, or by rendering the scene in a fully-fledged 3D rendering engine such as Blender.

Finally, the elevation data can be cross-referenced with other data to produce other kinds of shading.  The most accessible form of this is the climate shading of Fractal Terrains, which applies textures to the land based on altitude, temperature and precipitation.

All of these functions will be covered in future articles in this series.  For now, let's get back to the topic of creating out height field form scratch.

Making a Base Height Field in Photoshop
height field, height map, Feorad, Bruce Heard, World of Calidar, Thorfinn Tait, Equirectangular Projection
Feorad cropped from the Equirectangular Projection Calidar world map.  You may want to consider reprojecting each continent or region and working on it separately. There is no one perfect projection, but conformal (shape-preserving) projections are desirable for working on height maps and erosion.  At a bare minimum, the poles will need to be done separately from the rest of the world.
Setting Up
Open your finished continental outlines file in Photoshop.  If it needs cropping, reprojecting, or scaling, do that now.  (See my previous articles on Continental Outlines and Map Projections and Scale for more on these topics.)  If it's not already white land on black sea, you'll need to make that change now too.  After changing the colours to black and white, run Image / Adjustments / Threshold / 128 to make sure that the edges are sharp — anti-aliasing can cause problems during erosion, so it's best to work with sharp edges for now.

height field, height map, Feorad, Bruce Heard, World of Calidar, Thorfinn Tait, Lambert Conformal Conic Projection
Feorad reprojected onto a conformal projection, Lambert Conformal Conic.  The point at the top is the north pole.  This is revision 4j.  Early on I decided to use a number plus letter versioning notation for Calidar's maps, starting with 1a.  Major changes incur a number increment, while minor changes advance the letter.  The resulting version codes are easier to remember and therefore more meaningful.  As of February 2014, Calidar's latest revision is 4j.  Other worlds have their own codes, so Soltan is on version 2c, and Ghüle is on 2a.  These codes allow me to see what maps and data are concurrent with each map.
Since this is an image map, we don't need any colour: Image / Mode / Greyscale.  You can work in either 8 or 16-bit.  These settings are also in the Image / Mode menu.  8-bit provides 256 shades, while 16-bit ups that to 65,536 shades.  If you're going to be doing erosion anyway, it's not actually all that important, because erosion will smooth over imperfections in the height map anyway.  Using 16-bit files will also take more memory, and entails longer loading and saving times.  Personally, I usually work with 16-bit PNG files despite these disadvantages.

Name the coastline layer with the world/region name and version, and set Opacity: Multiply.  This layer will be one of the top layers of your file.  Multiply means that black will mask out everything below it, while white becomes completely transparent, allowing everything below it to show through.  So you can think of this layer as a sea mask.

Let's create some layer folders to keep things organised.  Do this now for the coastlines layer by selecting the layer and pressing Control/Command G (or choosing Layer / Group Layers in the menu).  Rename the group to Coastlines.

height field, height map, Thorfinn Tait, Adobe PhotoshopGroups may seem unnecessary now, but as you accumulate more adjustment layers they will be a big help.  They also allow you to easily toggle the visibility of each group of layers.

Next we'll set up a shadow around the coast.  These layers will make land fall away more gradually to the sea.  Without them, your land masses will likely be surrounded by tall cliffs.  Hit W to select the Magic Wand Tool, set Tolerance: 0, Anti-alias off, Contiguous off.  Select the coastlines layer and click on the black sea area to select it.  Press Control/Command J to do a Layer Via Copy, then Control/Command G to make a new group for it.  Name it Coastal Shadow, and move it out of the Coastlines folder, to the bottom of the layers panel.  Rename the layer itself Coastal Shadow 1.

Right click on Coastal Shadow 1 and choose Blending Options, then Stroke.  Dial in the following settings: Size: 50, Position: Outside, Blend Mode: MultiplyOpacity: 100%, Fill Type: Gradient, Gradient: Black, White, Reverse: Yes, Style: Shape Burst.

Depending on your map, you may need to tweak this shadow.  You can do this by adjusting the size, and if necessary the opacity.  Come back and experiment with this later, when your height field is almost complete.

For now, click on the eye to Hide the Coastal Shadow folder.  Processing this layer can be processor intensive, and you may find that the file is much more responsive with it off.  Don't forget to turn it on again later, though.

Set up one more folder for future use: click on the folder icon at the bottom of the Layers panel to create a new group.  Rename it Altitude Scaling, and move it to the top, above Coastlines.  We'll come back to Altitude Scaling later.
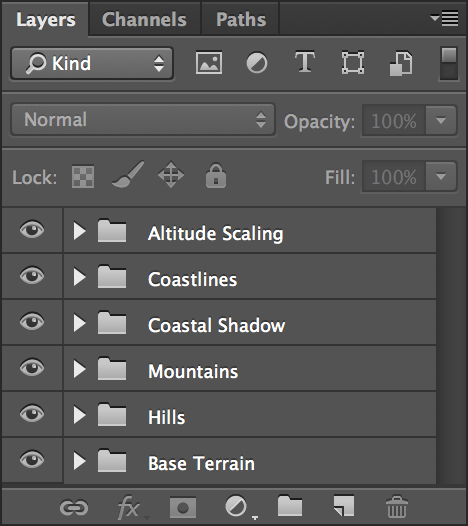
Terrain Layers
height field, height map, Thorfinn Tait, Adobe PhotoshopNow it's time to start on the terrain itself.  Make three new layers at the bottom of the file, underneath Altitude Scaling.  Name them Mountains, Hills, and Base Terrain, and place them in that order top to bottom.  Create layer groups for each of these layers (Control/Command G), and name them Mountains, Hills and Base Terrain too.

Hit D to reset palette colours to black and white, then 
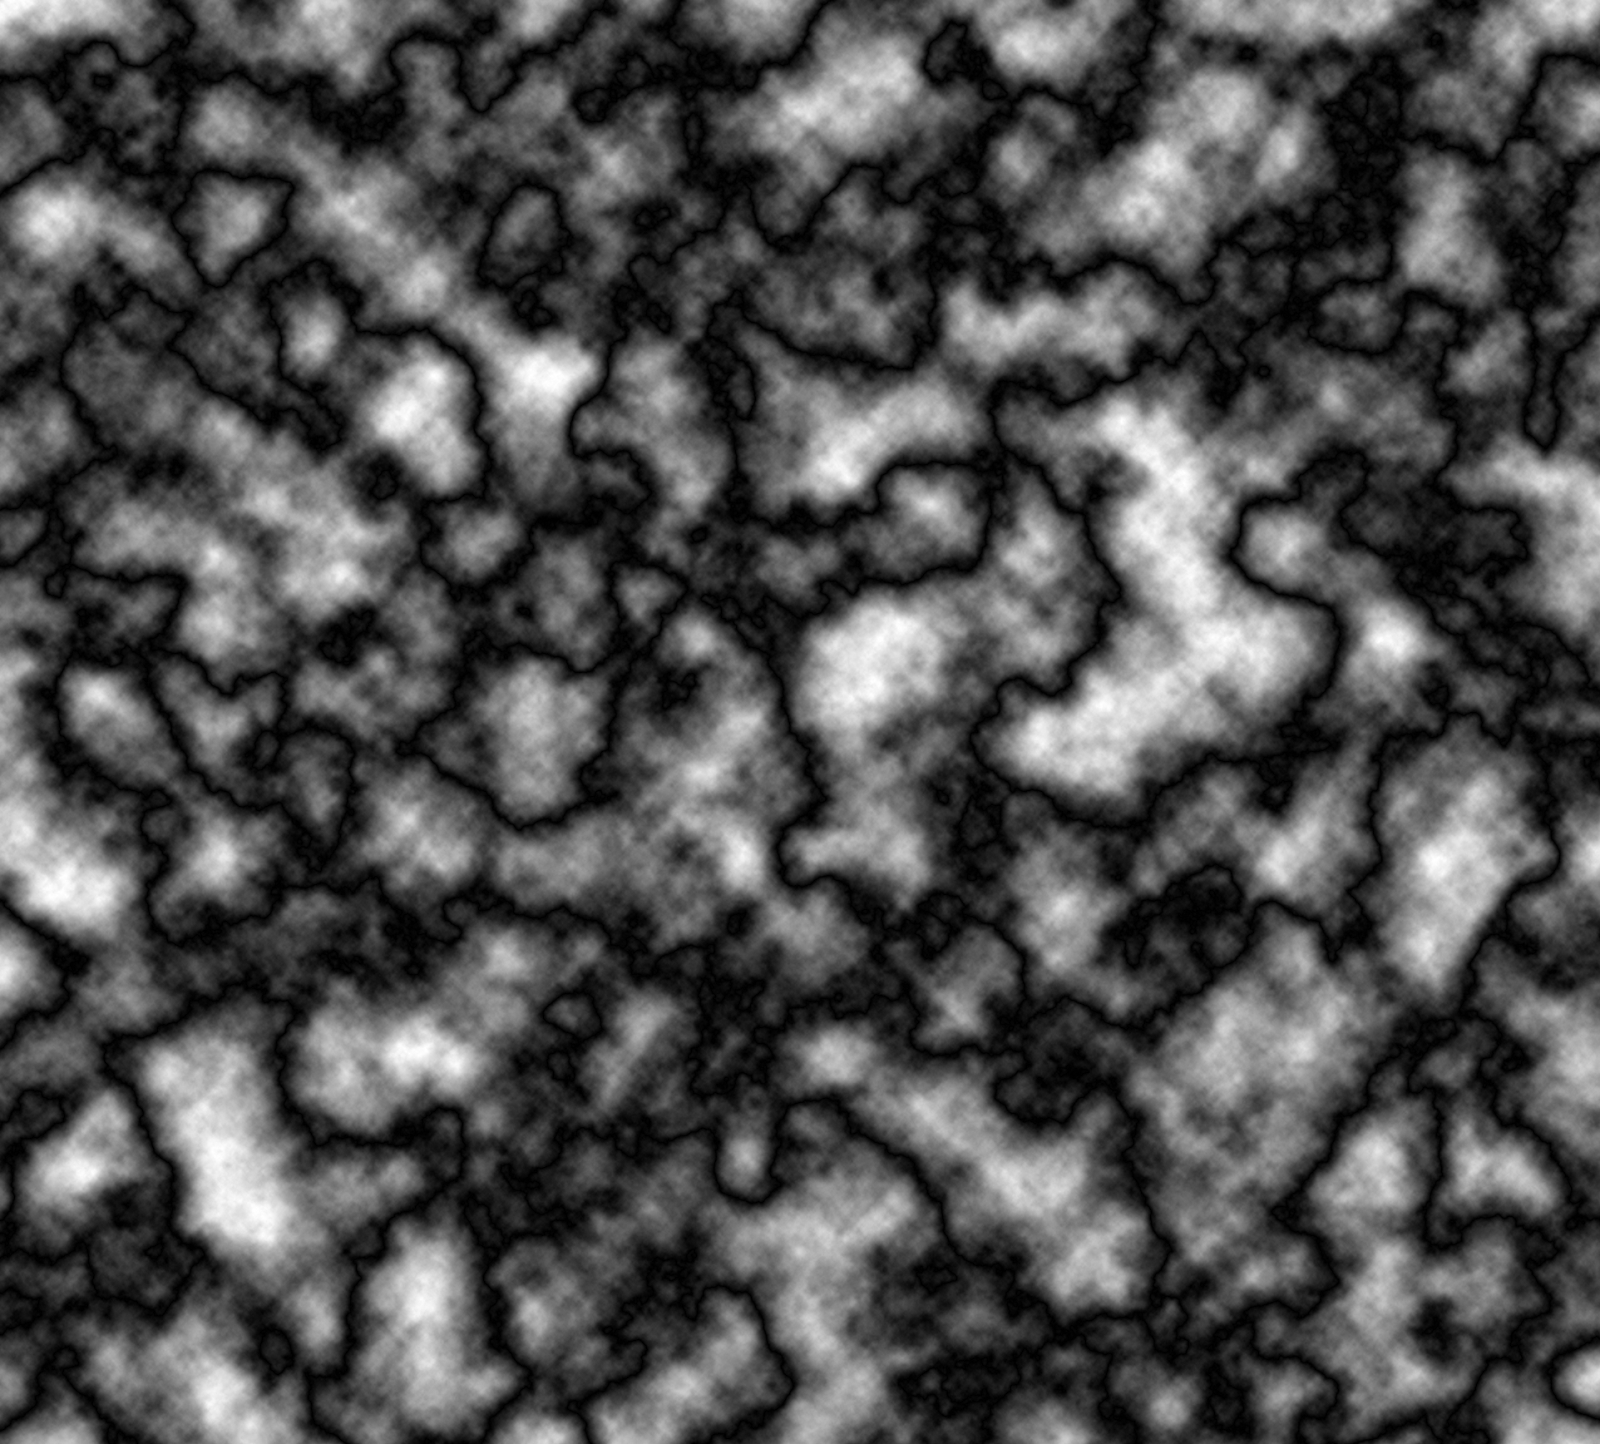
Filter / Render / Clouds in all three layers.  For the mountains layer, optionally hold Alt/Option while clicking in the menu to render clouds; this will give higher contrast clouds.

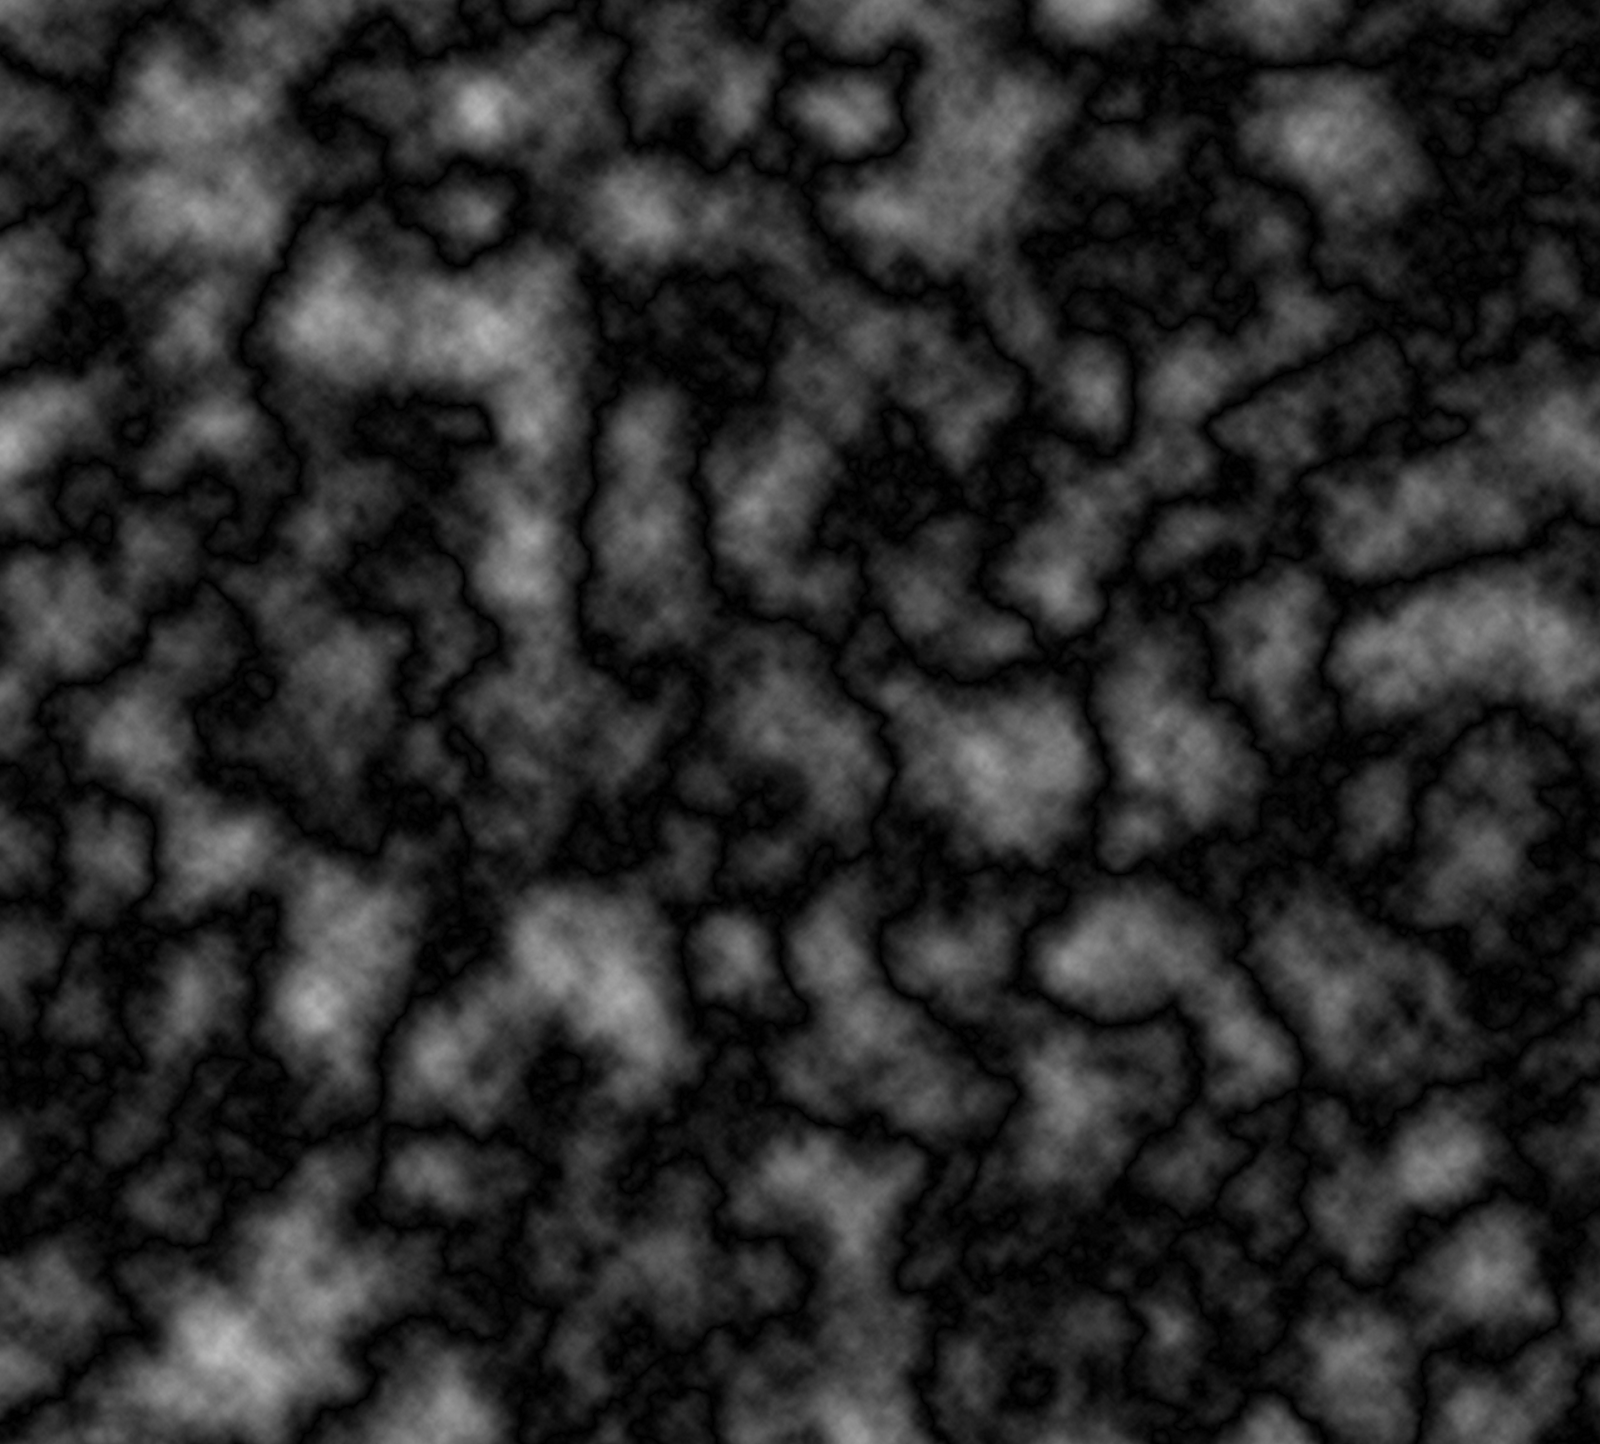
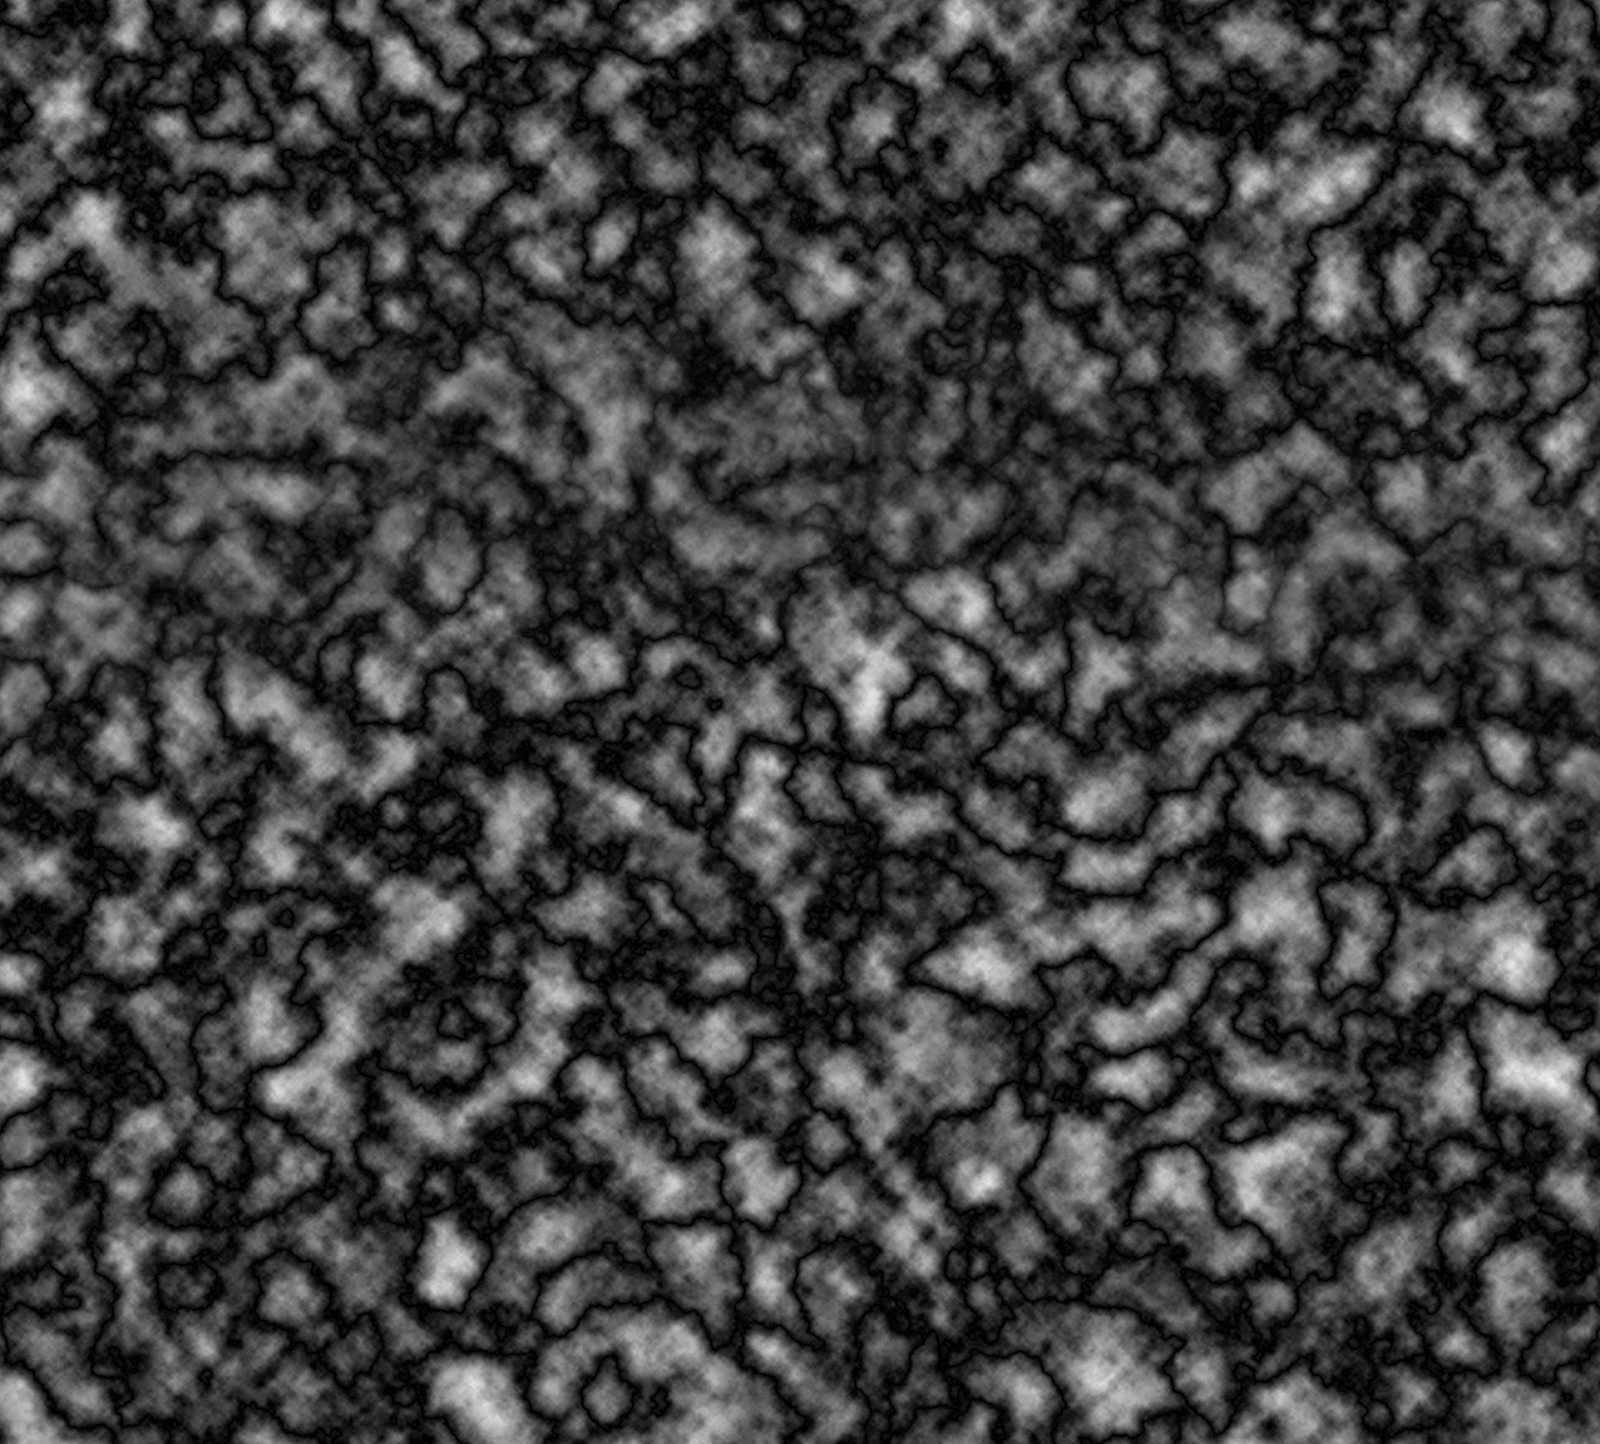
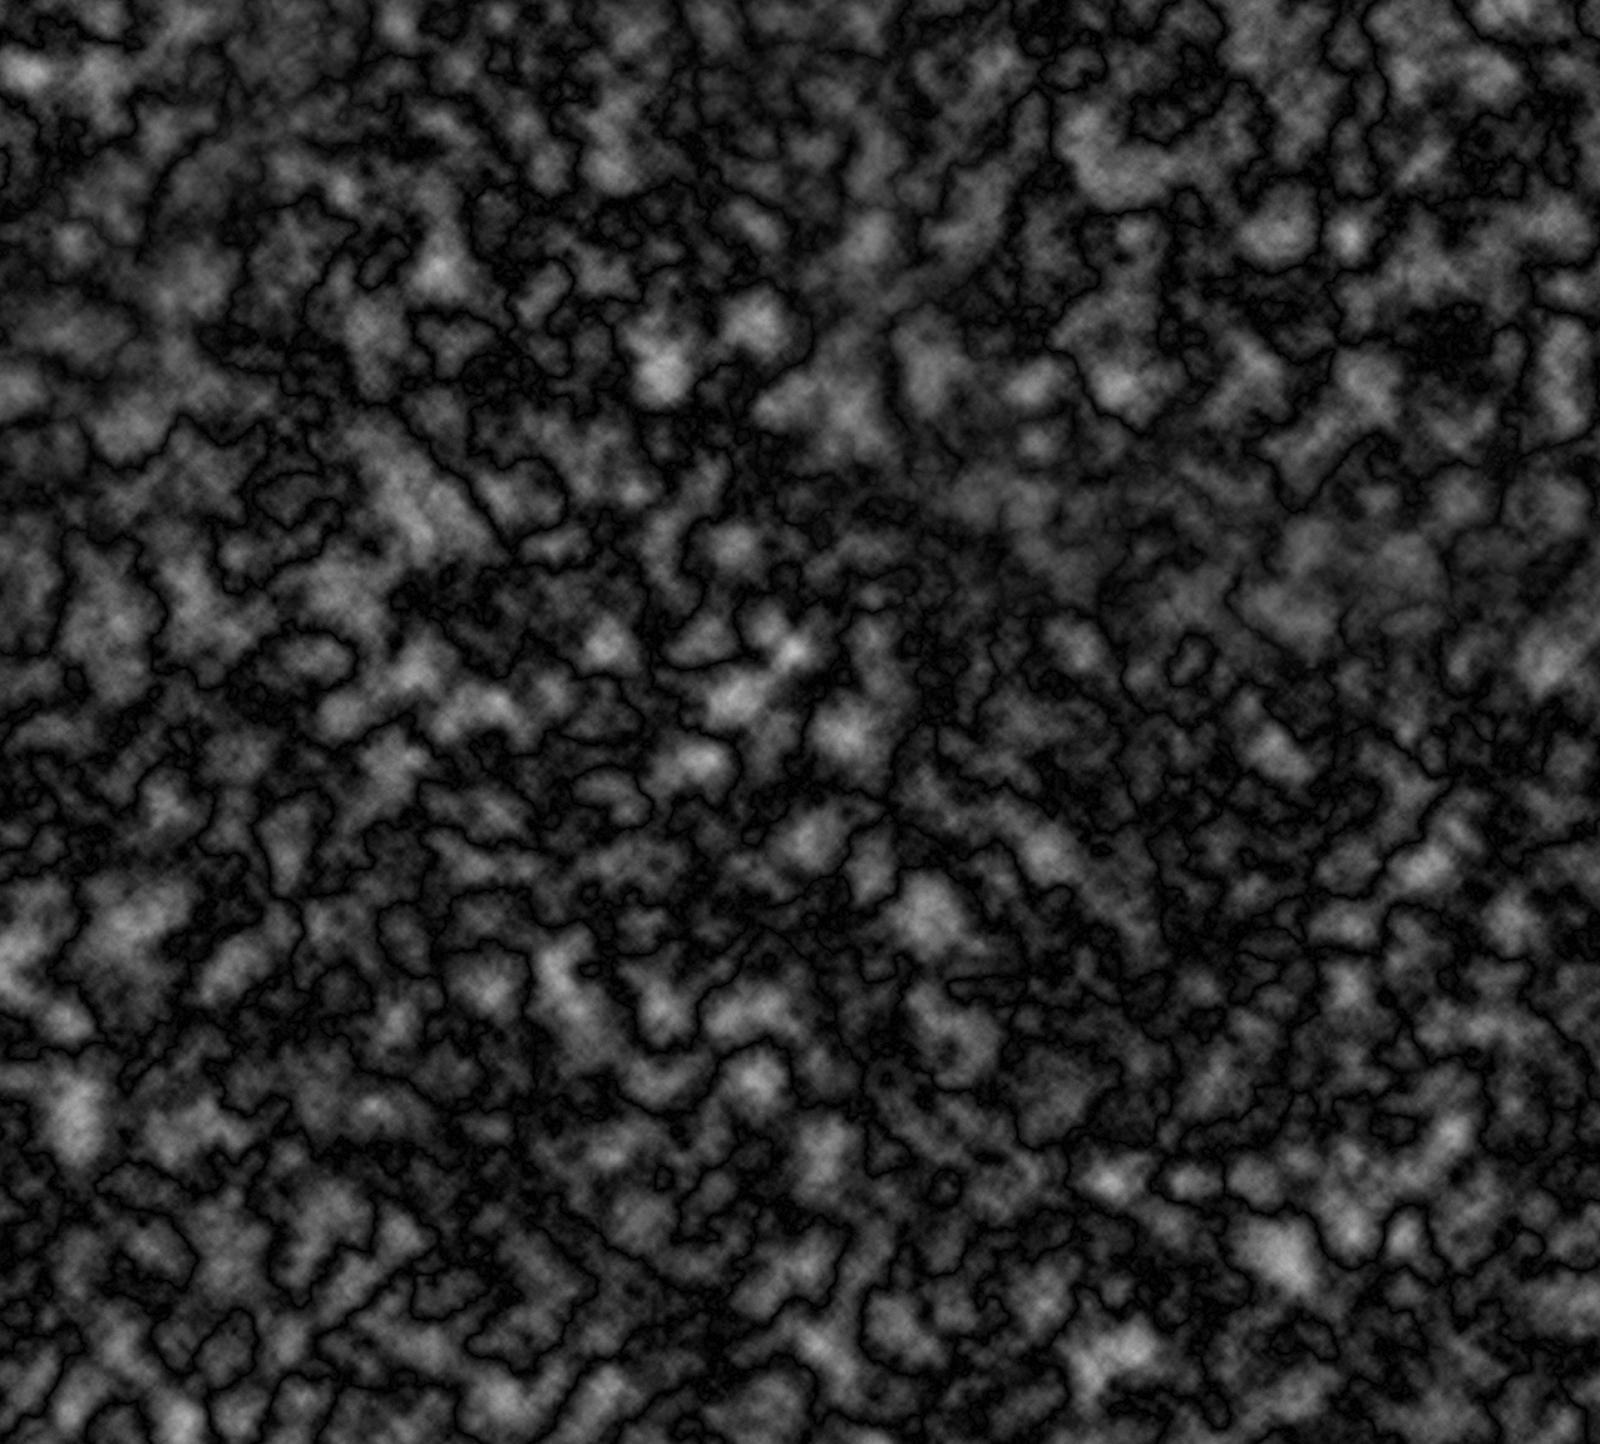
Optionally, you can render the clouds at half size and scale them up, or at double size and scale them down.  Each white cloud will become a peak in your final map, so in this way you can control how big or small the mountains will be.  Your choice will depend on the scale of your image.  For Calidar, I rendered clouds in a separate file that was double the dimensions of the main map, then scaled them down and copy-pasted the layer in.

For all three layers, Filter / Render / Difference Clouds, and repeat until you get a random texture to your liking.  I'm partial to the valley-like channels you get with either one or three renders of difference clouds, so I tend to do just one step of difference clouds for hills and mountains, and either one or three for base terrain.  Experiment and find something you like.  Remember that at any stage you can also invert the clouds to get a different effect.

Add a levels adjustment layer (Layer / New Adjustment Layer / Levels, or click the icon in the Adjustments panel) above each of the three terrain layers.  Right click on each level layer and select Create Clipping Mask (or Alt/Option click the layer) so that the levels only affect the layer immediately below.  Then dial in the following settings:
  • Mountains: 0/1.40/188Output Levels: 175/255
  • Hills: 0/1.80/195Output Levels: 87/191
  • Base Terrain: 0/1.00/240Output Levels: 1/104
Your file is now ready to go.  Time to start shaping the terrain.
height field, height map, Thorfinn Tait, Adobe Photoshop, render clouds height field, height map, Thorfinn Tait, Adobe Photoshop, render clouds height field, height map, Thorfinn Tait, Adobe Photoshop, render clouds height field, height map, Thorfinn Tait, Adobe Photoshop, render clouds
Difference clouds applied once
High contrast, full resolution
Mountain base layer
Difference clouds applied once
Normal contrast, full resolution
Hills/Base terrain base layer
Difference clouds applied once
High contrast, double resolution
Mountain base layer
Difference clouds applied once
Normal contrast, double resolution
Hills/Base terrain base layer
Sculpting Hills and Mountains
Add layer masks to the Hills and Mountains terrain layers (click on the Add Layer Mask button at the bottom of the Layers panel).  Invert each mask by selecting it and pressing Control/Command I. Your Base Terrain layer will now be the only layer visible.

Next, draw in hills and mountains by painting white onto the layer masks of the Hills and Mountains layers.  The layer mask determines where and how much of each layer shows through.  There are a number of different ways to do this:
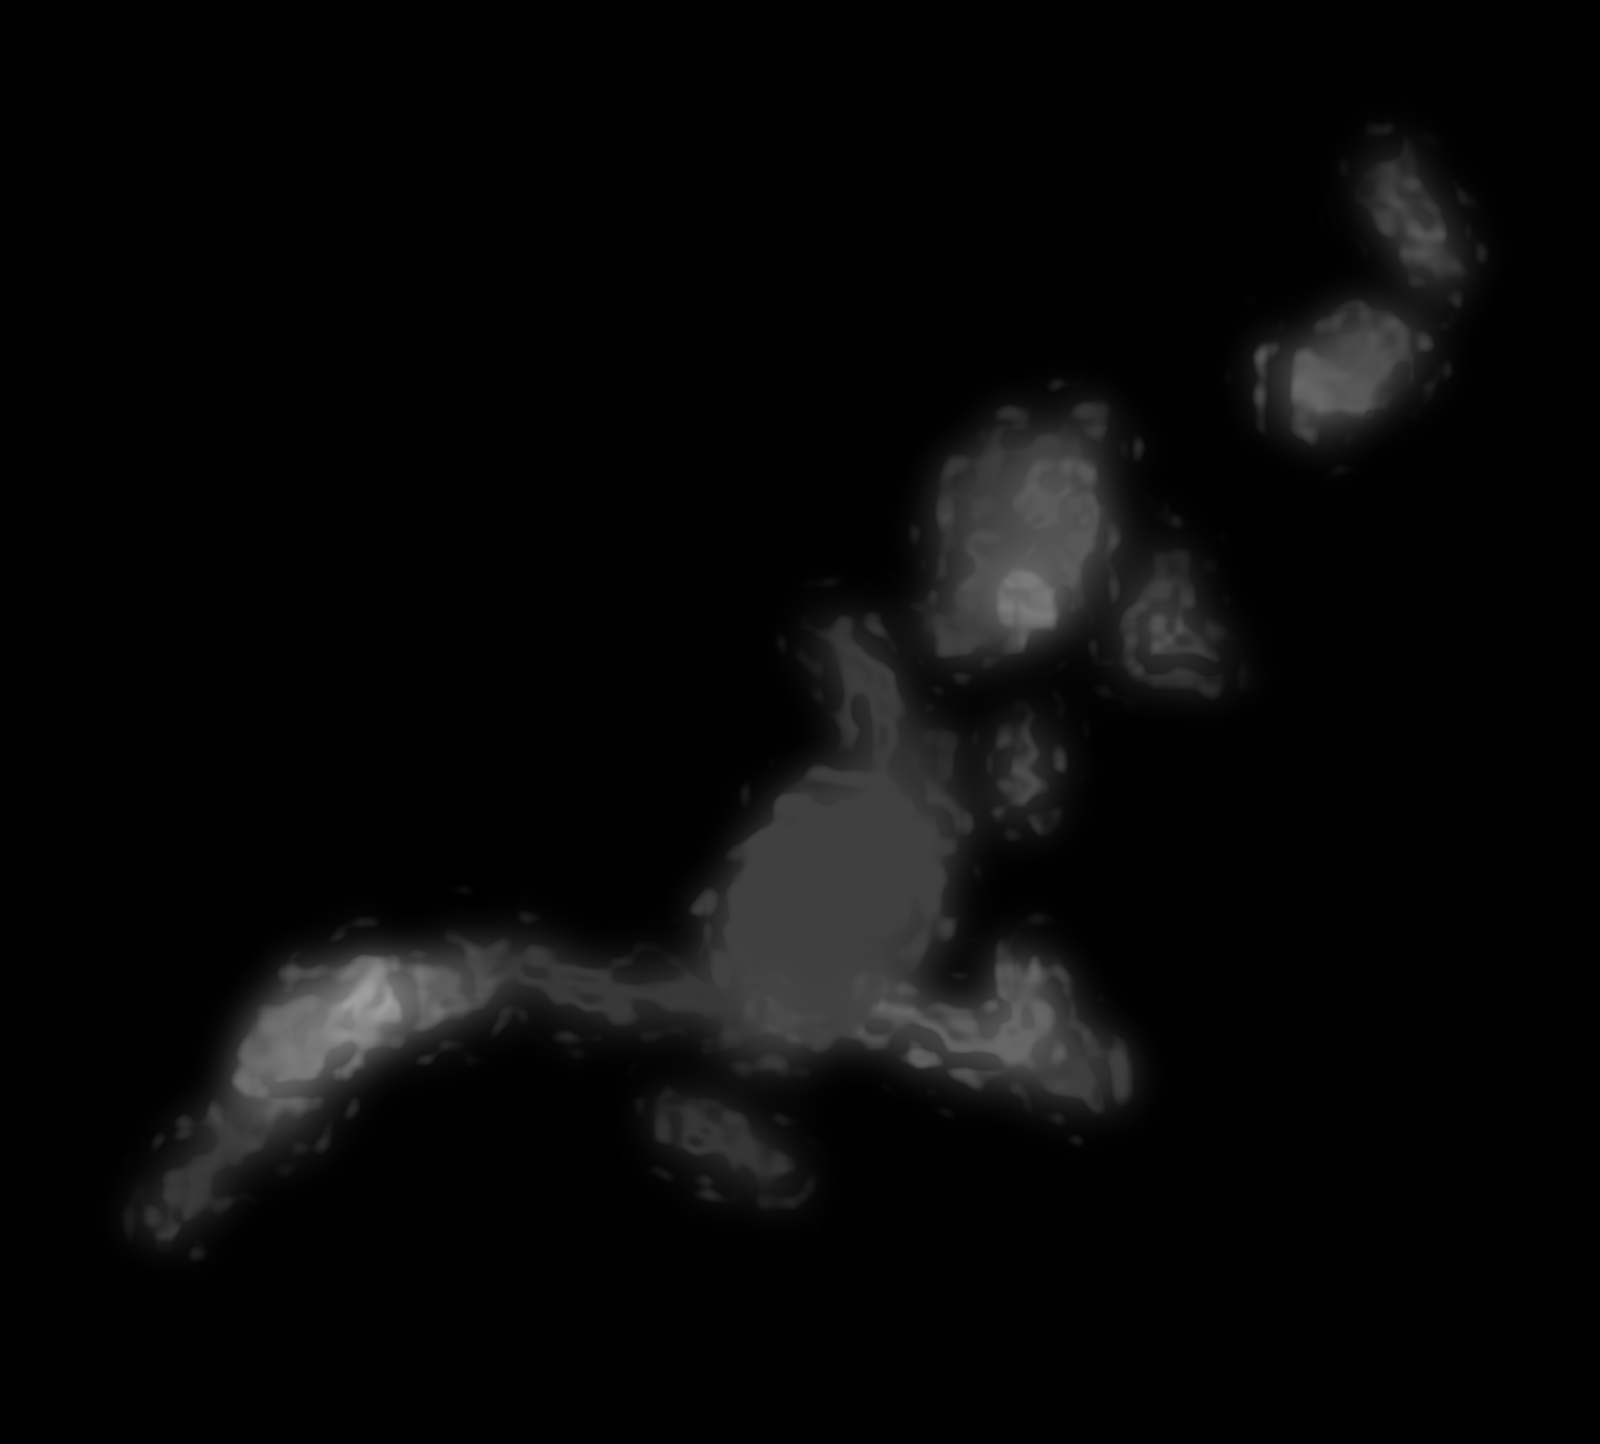
  • Using a soft, large brush, draw the broad strokes of your mountain ranges and hills in the adjustment layers.  Don't worry about making them random at this point — bold strokes with high opacity and large brushes are fine.
  • Use hard brushes (or an to make more decisive strokes, then select them and use expand selection and feather selection, followed by fill white to soften them up.  Again, don't worry too much about making them random.
  • Use a tablet to sketch your mountain shapes.  Set pressure-sensitivity to opacity, and it should be easy to create convincing ridges and chains.
  • Click on the mask while holding Alt/Option to see the mask, and edit it directly.  The main advantage of doing this is that you can paste directly into the mask, so it's possible to copy and paste other images to create your mask.
  • Use filters to create or edit your shapes.
Regardless of how you create your mask, the last option is a good way of finishing it off.  I use a jiggle filter to roughen and randomise my mountain and hill masks.  Alien Skin's Eye Candy 7 Photoshop plug-in has a "shower door" setting which can do the job, especially with extreme settings.  Try experimenting with other filters to mess up your design.
height field, height map, Thorfinn Tait, Adobe Photoshop, layer mask height field, height map, Thorfinn Tait, Adobe Photoshop, layer mask height field, height map, Thorfinn Tait, Adobe Photoshop, layer mask height field, height map, Thorfinn Tait, Adobe Photoshop, layer mask
Hills mask drawn with soft, low opacity white brush The same hills mask with "shower door" filter applied Mountain mask drawn with soft, low opacity white brush The same mountain mask with "shower door" filter applied
Tweaking
When you are satisfied with your hills and mountains, zoom out and have a look around your map.  Zoom in and look at the details.  Tweak the layer masks here and there where necessary.

If you want to flatten out the base terrain in places, use the eyedropper to pick up a very dark grey (not black!), then paint on a new layer (call it Adjustments) directly above the Base Terrain layer using soft, low opacity brushes.  The same technique can be used to make plateaus on the Hills and Mountains layers: create an Adjustments layer, then pick up a median colour from the area and paint in your flat area, building it up slowly using soft, low opacity brushes.

Be aware that your base height map will more directly affect the final look of your map than any other factor.  In particular, erosion will sculpt your mountains nicely, and it will smooth out minor artefacts and graphical glitches.  But it won't solve major problems that were inherent in the height map to start with.  It's worth taking the time to tweak things at this stage, at both micro and macro levels.  The erosion process takes time, and such tweaks become much harder to do after erosion.

With that said, there have been many times that I didn't discover something was a problem until I finished the erosion process.  As a result, most of Calidar's maps have actually gone through multiple passes of height field building and erosion, with each pass returning to the drawing board to fix various problems with the design before going through erosion once again.

Outputting your Height Map
Save your file, then Layer / Flatten Image and save as a PNG.  I have had problems using "save as copy" files in Wilbur, so although it's a more convenient option, it seems to be more reliable to flatten and then save as a PNG.  Another option is copying merged: Select All with Control/Command A, then Shift Control/Command C to Copy Merged.  Control/Command N to create a new image just right for the clipboard data, and Control/Command V to paste.  Save that image as a PNG file.

Now it's off to Wilbur, for erosion!

Well, actually no — probably not yet.  We will load up Wilbur, but before starting erosion, it's well worth going through one last round of tweaking.

Basin Tweaking
Load your PNG into Wilbur.  Have a look around — Zoom In with Control +, Zoom Out with Control -.  Seeing things shaded using Wilbur's shaders should give you a new perspective on your map.

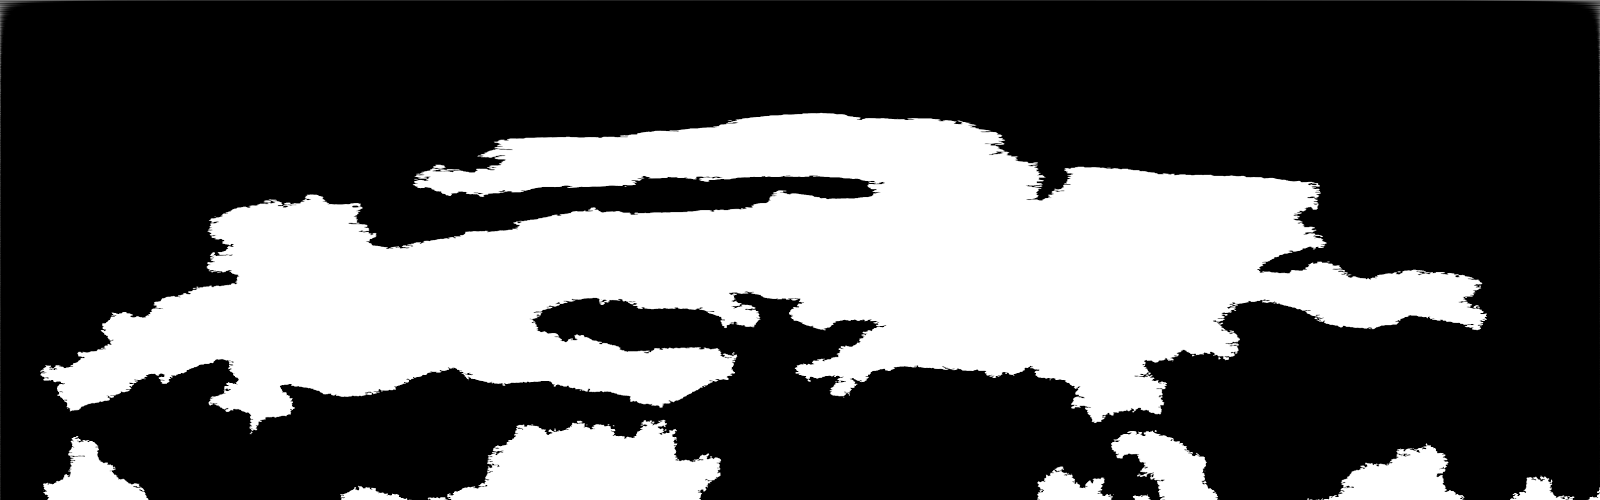
Now let's see what happens when we use Wilbur's Fill Basins command.  Filling basins is an important part of the erosion process, without which the incise flow command does not function.  Any basins without drainage will be filled up to the level of the lowest drainage point in the surrounding rim.  Unfortunately this means that it is not possible to include basins without drainage in your design.  This includes lakes, which will need to be re-dug after erosion has been completed.  If you want to include lakes or other such depressions completely surrounded by higher terrain, create a channel out of the area to lower terrain, and fill it in again much later after erosion processing.

Select / From Terrain / Height Range: 1 - 999,999 to select only the land.  Filter / Fill / Fill Basins or just hit Control B.  (Note that Wilbur's fill basins command is limited to images of 10,000 pixels square or less.)  Then compare the results with your map in Photoshop.  If it helps, save a copy out and import it in to your height map Photoshop file: File / Save As / PNG Surface (the default — click yes for 16-bit).  This will allow you to more easily see which areas need tweaking.

The areas filled in will be completely flat, which may be undesirable.  Small areas can be ignored, as erosion will take care of them, but with larger areas it may well be worth tweaking the height map design to prevent them from being filled in.  This is done by darkening the edge of the basin to create a channel to a lower area.

Wilbur has a number of different shaders to choose from, available in the Texture menu.  Greyscale Bump Shader is the black and white raw data view which corresponds to the height map design in Photoshop.  But this is not the most human-readable shader.  I find that it's easier to understand what I'm looking at using the Wilbur Shader, which is freely customisable.  Although it's configurable to other settings, it's usually altitude-based.  This kind of shading is known as hypsometric tinting.  It's easy to conflate climate information with this shading, which would be a mistake.  It assigns colours based on altitude alone.  For this reason, many cartographers avoid using a realistic-looking palette.  As long as you bear in mind what the colours mean, there shouldn't be a problem – but bear this issue in mind especially when showing other people your map.

You can save any of Wilbur's shaders as PNG files — just choose PNG Texture in the Save As dialog window.  Note that should you wish to import these into your Photoshop height map design file, you may need to first set your image to colour: Image / Mode / RGB Colour.  Otherwise the imported images will just show up as greyscale.

Altitude Scaling
There's one last thing to do before our height field is finished: scale the relative altitudes on the map.  There are two reasons to do this:
  • To keep all of your maps in scale with each other, and
  • To add some variation to the height of mountain peaks across your map.
For Calidar, Bruce decided on the height of the highest point, and I added a white marker to all of the height fields showing that height.  Altitudes across the map are then lowered using a levels adjustment layer.  This is necessary because any height field loaded into Wilbur is automatically scaled across the maximum range of greyscale values.

The other issue is that my height map design can easily result in a map where the highest peaks are the same throughout a mountain range, or indeed throughout the map.  This just looks wrong.  The solution is in the same levels adjustment layer.

Here's how it works: make a new layer in the Altitude Scaling folder, and name it Absolute Height Value.  Somewhere in the sea, draw a large white dot with a large, hard brush.  This white dot represents the highest altitude on your world.  Next, create a new levels adjustment layer below the Absolute Height Value.  Set the Output Levels at whatever level you want the average highest altitude to be.

You can calculate what number you need to enter by the following formulas:
Absolute Height Value / 255 = altitude per shade 
Average Highest Altitude / altitude per shade = Output Level (highlight)
For example, on Calidar the absolute height is 8925 m.  I would like to set the average highest altitude at around 2500 m.
8925 / 255 = 35
2500 / 35 = 71.4
The Output Level only accepts integers, so we have to round to 71 or 72, but regardless this will be about right.

Now comes the interesting bit: add a Layer Mask to the levels adjustment layer.  Painting black with a soft, low opacity brush on this mask will gradually disable its effects.  The affected areas will have their maximum possible altitude raised.  This is a very powerful effect: you can use it to define the overall vertical shape of mountain ranges, and even to mark out certain peaks as being of certain heights.

Hypsometric Tints in Photoshop
Here's one last tip for working with height maps in Photoshop: you can use a Gradient Map to shade your terrain in exactly the same way as Wilbur's custom shader.  This is invaluable, because it allows you to see a more human-readable version of your map as you edit it.

To set it up, all you have to do is place an Image / Adjustments / Gradient Map beneath your coastlines file.  Note that if you are working in greyscale you will need to change to RGB Colour mode in order to see things in colour.  If this is unfeasible (for example if the image file is rather large, and in 16-bit greyscale), another option in Photoshop CC is to make a new file with the gradient map and use File / Place Linked to insert a linked copy of your height map below it.  The disadvantage is that you won't be able to see corrections as you make them.

You can customise your gradient map however you like; for Calidar I have recreated my custom Wilbur shader in Photoshop, so that I can use the same colours in both programs.

Gradient maps in Photoshop will be covered much more thoroughly in a later article, so I'll leave it at that for now.

Erosion
Once you've finished all this tweaking and are satisfied with your design, save your file one last time, then follow the instructions above under Outputting your Height Map to save your finished height field as a PNG for use in Wilbur.

That's all for this tutorial.  Erosion will appear soon in its own article.

Sunday 2 February 2014

Soltan Ephemeris

I've been very busy working on maps for the +World of Calidar since I last posted.  +Bruce Heard has shared some of the results on his blog, and today I'd like to share another variation of the Soltan Ephemeris diagram.

Soltan Ephemeris triple-scaled diagram, showing orbital distances, relative planet sizes, and moon orbits of Calidar and its neighbours.

The same diagram is on Bruce's blog post, but in vertical form.  Both were a lot of fun to make.  I started off trying to use scaled measurements from a chart I've been keeping with all the precise measurements of the planets, before realising that I could simply resize the existing diagram to get all the orbits at their proper scale.

Soltan Ephemeris Overview and Orbital Map, showing Draconia, Calidar and its moons, Lao-Kwei and its moon, the Fringe, and Ghüle.  Solar System Map.
Soltan Ephemeris Overview and Orbital Map
as featured on Bruce's blog.
There is an intrinsic problem with trying to make a scale diagram of any solar system: the distances between a star, its planets, and even their moons are so great that they reduce even the largest star to a small point in space.  What this means is that a properly to scale diagram is pretty useless.

To get around this issue, I have split the image into three different scales.  Each scale is consistent only within its own domain.
  1. Orbital distances: all planetary orbits are to scale with each other, measured from Soltan's corona.  The orbits shown are at the 3 o'clock position on the orbit diagram.
  2. Planet sizes: all planets, including moons, are to scale with each other, and indeed with Soltan. But Soltan is so massive that only a tiny portion is visible in this diagram.
  3. Lunar orbital distances: all lunar orbits are to scale with each other, measured from the centre of their parent planet.  They are not in scale with planetary orbital distances; putting them in scale would make them overlap with the orbs of the planets.
There is one further issue: Ghüle is so distant when it's in the 3 o'clock position that it would require the diagram's width to be more than doubled in order just to fit it in.  Moreover, its orbit takes it much closer to the sun at other points, so there is no single logical distance to display it at.

Soltan Ephemeris triple-scaled diagram, showing orbital distances, relative planet sizes, and moon orbits of Calidar and its neighbours.  Ghüle is in its proper position.
Ghüle in its correct 3 o'clock position.
As a result, we have chosen to arbitrarily show it at a more reasonable distance outside the Fringe.  It actually does pass through this position at two points of its journey around Soltan, once before passing inside the Fringe, and again after passing outside again.  I think it's a good compromise.

These diagrams are actually mock-ups, waiting to be populated with marble-like globes, such as the Calidar rendered globe we used in the Kickstarter campaign.  You'll have to wait a while longer to see those, but I hope I can make it worth the wait.  The final version will likely be featured in the final book, too.

One final note: as you may have already noticed, I have added a permanent page devoted to the Soltan Ephemeris Calculator, accessible through the buttons under the site heading above.  This allows easy calculation of the exact positions of the worlds of the Soltan Ephemeris by inputting a date on the Calidaran calendar.